When homeowners think about home upkeep, ceiling fans rarely claim top priority until a sudden summer heatwave or winter freeze highlights a performance issue. Establishing a routine seasonal maintenance checklist ensures your fixtures operate efficiently, quietly, and safely throughout the year. Neglecting basic upkeep often leads to annoying wobbles, squeaking bearings, and reduced air circulation in your living spaces.
By investing just a few minutes of inspection and cleaning during your routine transitions, you can protect your motor and maintain optimal comfort in every room. Understanding the relationship between mechanical wear and environmental exposure allows you to catch minor anomalies before they escalate into major electrical or structural failures.

The Core Elements of a Proper Upkeep Routine
Routine care involves several distinct tasks that address both the mechanical components and the aesthetic condition of your fixture. A comprehensive seasonal maintenance checklist helps you catch minor issues like loose screws before they turn into costly repairs or safety hazards. Here are the primary areas that require your attention during each change of season.
When approaching your home maintenance schedule, it helps to break down the fixture into distinct zones. The upper housing contains the critical electrical connections and motor assembly, while the downrod links this heavy core to the ceiling anchorage. Further down, the blade irons and individual blades manage the physical movement of air.
Every single one of these components experiences distinct stresses depending on usage patterns, room humidity, and seasonal temperature swings. For instance, homes situated in arid climates deal with dry dust accumulation that adheres differently than the sticky, moisture-laden grime found in coastal or tropical environments. Tailoring your cleaning and tightening regimen to account for these local conditions ensures that your ceiling fan maintenance remains proactive rather than purely reactive.
Cleaning Blades and Accumulation Removal
Dust buildup on fan blades creates an aerodynamic imbalance that forces the motor to work harder than necessary. Over time, trapped moisture in humid environments turns dry dust into a stubborn crust that clings to the trailing edge. We generally recommend wiping down each blade with a damp microfiber cloth and a mild cleaner to eliminate drag.
For high-ceiling installations, a specialized long-handled duster or a pillowcase slipped over each blade prevents dust from scattering onto your furniture. Inspecting the surface finish while cleaning also helps you spot any warping or moisture damage early.
Beyond simple aesthetics, accumulated dust significantly alters the weight distribution and aerodynamic profile of each blade. Even a thin layer of particulate matter can disrupt smooth airflow, creating microscopic drag that strains the internal motor windings. If you operate your fixtures continuously throughout the summer and winter months, inspecting the top and bottom surfaces of every blade every three months prevents heavy crusts from forming.
When dealing with wood blades, avoid soaking the material with excessive water or harsh chemical sprays, because moisture infiltration can cause the wood to swell, warp, or split along the grain. Synthetic and ABS plastic blades tolerate damp wiping much better, though you should still dry them thoroughly with a clean towel to prevent water spots.
Evaluating Hardware and Securing Fasteners
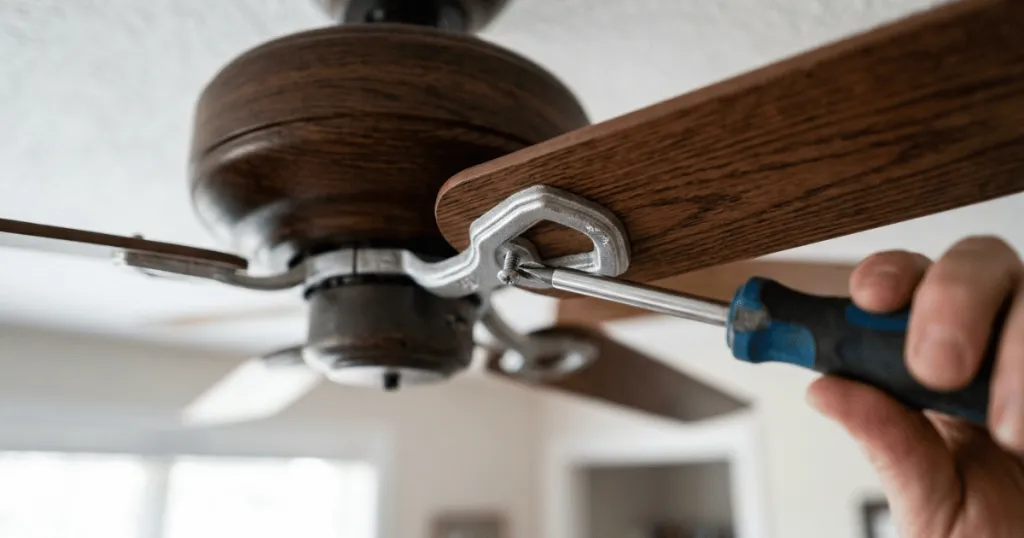
Continuous motor vibration naturally loosens the various screws that hold a ceiling fan together over months of operation. Your maintenance routine must include checking the blade irons, blade attachment screws, and the canopy mounting hardware. Tightening these components prevents annoying rattling noises and eliminates excessive play in the assembly.
A common mistake is over-tightening screws into wooden or plastic blades, which can strip the threading or crack the material. Use a gentle hand tool rather than a power drill to snug each fastener securely into place.
The mechanical stress placed on fasteners increases significantly in rooms where fans operate at high speeds for extended periods. As the motor spins, gyroscopic forces and minor structural shifts in the ceiling joists exert twisting pressures on the mounting bracket and electrical box. During your inspection, pay special attention to the lock washers and threaded inserts holding the blade irons to the motor flywheel. If a single screw works its way loose, the resulting play will amplify rapidly, creating a noticeable wobble that stresses the entire appliance. Checking the canopy screws is equally important, because a loose canopy can vibrate against the ceiling drywall and generate an irritating buzzing sound whenever the motor runs.
Inspecting the Downrod and Canopy Assembly
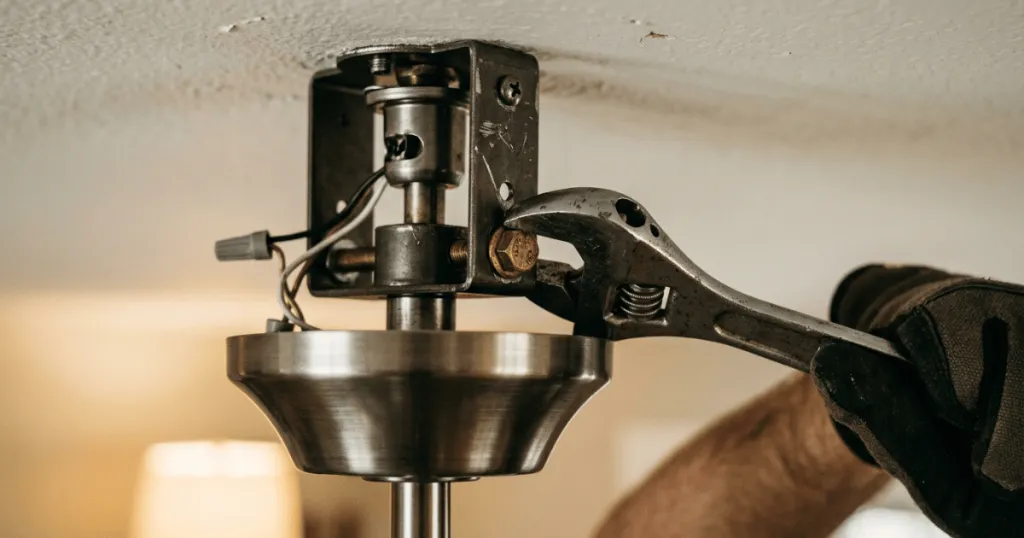
The connection points near the ceiling bear the full weight and torque of the moving fixture. Check the downrod pin, safety clip, and canopy screws to ensure everything remains rigidly aligned. If you notice any lateral shifting or unusual sagging, support the motor housing and verify that the mounting bracket is firmly anchored to the ceiling electrical box.
The entire structural integrity of a hanging fixture relies on the secure mating of the downrod ball into the mounting bracket socket. If the cross-pin or safety set screw works loose, the assembly can shift unexpectedly during high-speed rotation. Take time to inspect the wiring harness running down the center of the downrod as well, ensuring the insulation is not pinched or rubbing against the metal interior edges. For sloped ceiling installations, verify that the ball and socket joint rotates freely without binding against the canopy rim, which can restrict natural alignment and cause unnecessary stress on the upper hanging hardware.
Adapting Directional Rotation for Maximum Comfort
Changing the blade direction remains one of the most impactful steps on any seasonal maintenance checklist. During warmer months, blades should spin counterclockwise to push air straight down and create a cooling wind chill effect. This breeze speeds up moisture evaporation on your skin, making the room feel noticeably cooler without touching the thermostat.
When cooler weather arrives, switching the blades to spin clockwise at low speed pulls cool air upward. This gentle updraft forces warm air that has naturally risen to the ceiling back down into the living zone without creating a draft. Understanding this directional shift helps you maximize energy efficiency across your entire home heating and cooling system.
In practice, this means locating the reverse switch on the side of the motor housing or using your remote control system during spring and autumn transitions. Always wait for the blades to come to a complete stop before toggling the direction switch to protect the internal capacitor and motor windings.
The physics behind directional adjustments are straightforward yet frequently misunderstood. Warm air is less dense than cool air, which causes it to rise and accumulate near the ceiling in heated rooms. By reversing the rotation to a clockwise pattern at low speed, the blades draw air upward, displacing the trapped warm air and pushing it outward along the ceiling and down the walls. This process circulates heat back into the occupied living zone without generating an uncomfortable draft that cools human skin.
Conversely, the high-speed counterclockwise summer setting relies on direct convective cooling. By accelerating air downward, the fan enhances sweat evaporation from the human body, creating an effective temperature drop that allows homeowners to raise their thermostat settings by a few degrees without sacrificing personal comfort.
Real-World Context and Troubleshooting Common Issues
Every home presents unique environmental challenges that influence how often your fixtures require attention. Homes in coastal regions or high-humidity climates often experience faster corrosion on metal components and balance weights. In these environments, adding a light coat of protectant to exposed metal surfaces prevents oxidation and pitting.
If your fan exhibits a noticeable wobble after cleaning, the issue is rarely a broken motor. Minor weight discrepancies between blades or a slightly bent blade iron usually cause the wobble. Using a simple balancing kit, which includes a plastic blade clip and small adhesive weights, allows you to pinpoint the unbalanced blade through trial and error.
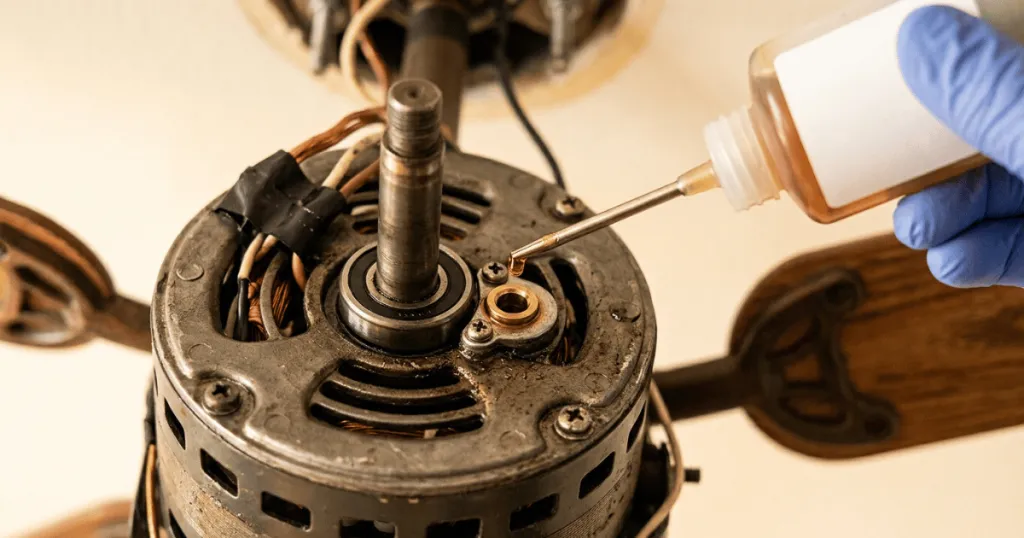
Noise issues typically stem from unlubricated bearings or rubbing canopies. Older models with oil ports require a few drops of non-detergent electric motor oil, while modern sealed bearings need no lubrication at all. If a humming sound persists, the wall dimmer switch might be incompatible with the fan motor, requiring a switch upgrade to a designated fan speed control.
Troubleshooting mechanical anomalies requires a methodical, step-by-step approach. When addressing a persistent wobble, start by measuring the distance from the tip of each blade to the ceiling, because a sagging blade iron is often the primary culprit. Gently bending the iron up or down by a fraction of an inch can often resolve minor alignment errors without needing adhesive weights. For electrical hums, check whether your wall control is a standard incandescent dimmer. Standard dimmers chop the electrical sine wave, causing AC motors to produce an audible 60-Hertz buzz. Upgrading to a fan-rated control eliminates this electrical interference entirely and protects the motor from overheating.
Why Routine Upkeep Matters for Longevity
Skipping routine care shortens the operational lifespan of your fixtures and increases energy consumption. A well-maintained motor runs cooler and draws less electrical current, translating to reliable performance over many years. Furthermore, proactive inspections catch frayed wires or loose support brackets before they create dangerous failure points.
When you integrate these checks into your household routine, you avoid unexpected replacements and costly service calls. Ultimately, a consistent seasonal maintenance checklist protects your investment and ensures your rooms remain comfortable, quiet, and safe.
Adopting a structured maintenance mindset also preserves the aesthetic appeal of your home fixtures. Dust accumulation, surface oxidation, and warped wooden components degrade the visual presentation of high-end architectural ceiling fans. By keeping surfaces clean and mechanical fasteners properly torqued, you ensure your fixtures remain an attractive focal point in your living areas while delivering dependable, silent airflow season after season.
FAQ
How often should I check and clean my ceiling fans?
You should perform a quick inspection and cleaning at least twice a year during the seasonal transitions between spring and autumn to ensure optimal airflow and mechanical stability.
Why does my ceiling fan wobble after I clean it?
A wobble is usually caused by minor weight discrepancies between blades, a slightly bent blade iron, or loose attachment screws. Using a balancing kit or tightening the blade irons typically resolves the issue.
Should my ceiling fan spin differently in summer and winter?
Yes. In the summer, blades should spin counterclockwise at medium to high speed to create a cooling wind chill effect. In the winter, they should spin clockwise at low speed to redistribute warm air trapped near the ceiling.