The Short Version: To ensure a secure installation, you must use a UL-listed, fan-rated junction box, verify the bracket is perfectly level, and use the manufacturer-provided hardware including lock washers. Always confirm the bracket is flush against the ceiling and that all mounting screws are tightened firmly without overtightening.
The stability of your ceiling fan begins entirely with the mounting bracket. Before you consider blade pitch, motor speed, or light kit aesthetics, you must ensure the foundation is rock-solid. A properly secured bracket acts as the structural anchor for the entire assembly, bearing the weight and rotational forces of the motor. If this initial connection is loose, misaligned, or attached to a non-rated junction box, the fan will inevitably wobble, vibrate, or pose a safety risk over time.
Successfully installing a mounting bracket is less about brute force and more about precision. By verifying your junction box rating and following the manufacturer’s specific sequence for wire management and screw tension, you set the stage for a quiet, long-lasting installation. This guide focuses on the mechanical and electrical prerequisites that determine whether your fan will operate smoothly or require constant maintenance.
Before You Start: Assessing Your Junction Box
The most common cause of ceiling fan failure is not the fan itself, but the mounting surface. You cannot simply attach a fan to a standard light fixture box. Ceiling fans require a UL-listed, fan-rated junction box designed to handle the weight and the dynamic, oscillating torque of a moving motor. If your existing box is plastic or lacks a clear “Fan Rated” stamp, you must replace it with a heavy-duty metal box or a fan-rated brace bar that spans the ceiling joists.
Check the ceiling joist orientation before you begin. If your joist is not centered where you want the fan, a fan-rated brace bar is your best solution. These bars expand between two joists, providing a secure, adjustable mounting point that can hold significantly more weight than a standard ceiling drywall anchor. Never attempt to use toggle bolts or drywall anchors for a ceiling fan; the vibration will eventually cause these fasteners to pull through the ceiling material, leading to catastrophic failure.
Finally, ensure the power is completely disconnected at the breaker box. Do not rely on a wall switch to cut power to the ceiling fixture. Use a non-contact voltage tester to verify that no current is flowing to the wires before you touch the junction box. This is the single most important safety step in the entire process.
Essential Tools and Preparation
Gathering the right tools before you climb the ladder saves time and prevents frustration. You will need a sturdy stepladder that allows you to reach the ceiling comfortably without overextending. A variable-speed power drill with a driver bit is useful for driving screws, but a manual screwdriver is often safer for the final tightening to avoid stripping the threads in the junction box.
You will also need wire strippers, a level, and a non-contact voltage tester. If you are working on a high ceiling, ensure your ladder is positioned on a flat, stable surface. Having a magnetic tray or a small bowl to hold the mounting screws is a simple but effective way to avoid losing small hardware while you are working overhead. Preparation also involves reading the specific manual for your fan model, as some manufacturers include proprietary vibration-dampening components that must be installed in a specific order.
Understanding Structural Requirements
The structural integrity of your ceiling is the silent partner in your fan installation. When a fan operates, it creates dynamic loads that differ significantly from a static light fixture. A standard junction box is designed to hold a few pounds of weight; a fan-rated box must handle the weight of the motor, the blades, and the constant, rhythmic torque generated by the motor’s rotation. If you are installing a heavy-duty fan, such as a large-diameter model or one with a heavy decorative housing, ensure your junction box is rated for that specific weight class. Most fan-rated boxes will clearly state their maximum weight capacity on the interior housing.
How to Install a Ceiling Fan Mounting Bracket
Once the junction box is confirmed as fan-rated and the power is off, you can proceed to the installation. Follow these steps to learn how to install ceiling fan mounting bracket hardware to ensure a secure, level, and vibration-free mount.
1. Thread the Wires
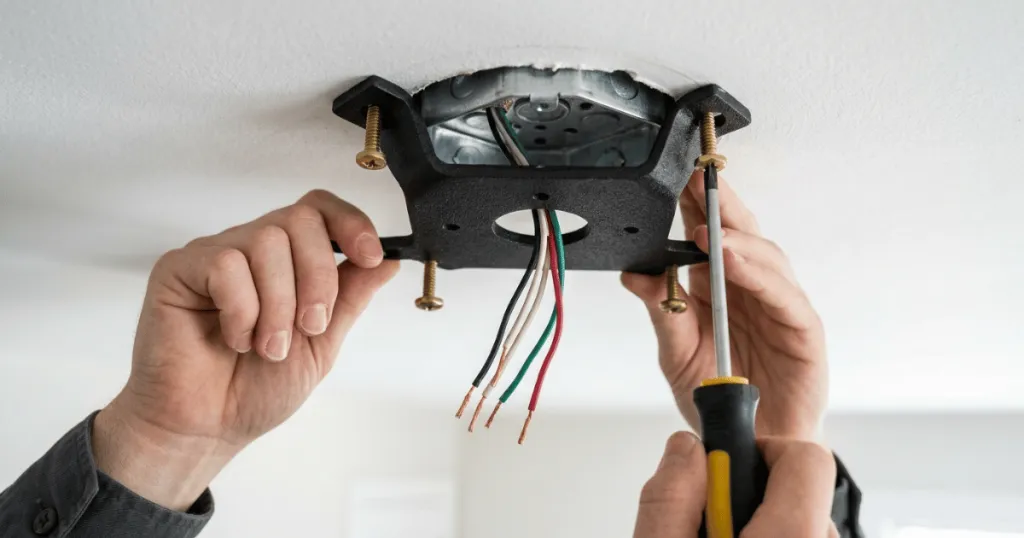
Before attaching the bracket to the box, pull the house supply wires through the center opening of the mounting bracket. This prevents the wires from becoming pinched or trapped behind the metal plate once it is flush against the ceiling. If your bracket has a rubber gasket or vibration-dampening pad, ensure it is positioned between the bracket and the ceiling surface. This gasket is critical for reducing the transmission of motor hum into the ceiling structure.
2. Align the Bracket
Hold the bracket up to the junction box. Most brackets have slotted holes that allow for slight adjustments. Align these slots with the screw holes on your junction box. If you are using a fan-rated brace bar, ensure the bracket is centered and that the screws provided with the bar are used, as they are typically hardened steel designed for higher load-bearing requirements. Avoid using generic wood screws; they lack the shear strength required for ceiling fan applications.
3. Secure the Fasteners
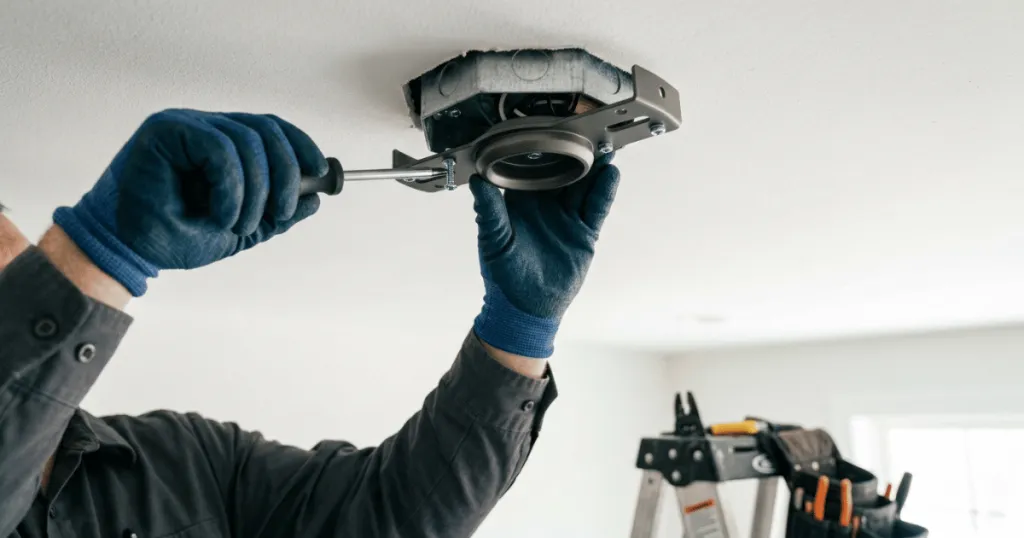
Drive the mounting screws through the bracket slots and into the junction box. Start both screws by hand to ensure they are not cross-threading. Once both are started, use your screwdriver to tighten them firmly. Do not overtighten to the point of deforming the bracket, but ensure there is no lateral movement. A loose bracket at this stage will translate into a noisy, wobbling fan later. If the bracket has a ground screw, ensure your ground wire is securely attached to it before proceeding to hang the motor.
4. Verify Levelness
Place a small torpedo level across the bracket. If the bracket is tilted, the entire fan will hang at an angle. If you find the bracket is not level, you may need to shim the junction box or adjust the mounting screws slightly. A perfectly level bracket is the foundation for a balanced fan. If your ceiling is sloped, ensure you are using the correct mounting bracket type, as some fans require a specific adapter for angled ceilings to keep the downrod vertical.
Common Installation Mistakes
The most frequent mistake is ignoring the weight rating of the junction box. Even if the box seems sturdy, if it is not explicitly rated for ceiling fans, it may lack the structural integrity to withstand the constant torque. Another common error is failing to use the provided lock washers. These small components prevent the mounting screws from backing out due to the natural, subtle vibrations of the motor over time.
Many DIYers also fail to fully clear the area of debris before mounting the bracket. Even a small piece of drywall dust or a stray wire strand caught between the bracket and the ceiling can prevent a flush fit. Always clean the surface before mounting. Finally, rushing the wiring step often leads to pinched wires. Take the time to neatly tuck the wires into the junction box so they do not press against the bracket, which can cause the bracket to sit unevenly. Improper wire management can also lead to short circuits if the insulation is damaged by sharp metal edges on the bracket or box.
Troubleshooting Mounting Issues
If you notice the fan wobbling immediately after installation, the first place to look is the bracket. Check the mounting screws to ensure they are tight. If the bracket feels solid, check the connection between the downrod ball and the bracket cradle. The ball should sit securely in the groove of the bracket, preventing the fan from rotating independently of the mount.
If you hear a clicking or tapping noise, it may be the bracket vibrating against the ceiling. This often happens if the ceiling surface is textured or uneven. Adding a thin rubber gasket or a small amount of weather stripping between the bracket and the ceiling can dampen these vibrations. If the bracket itself is bent or damaged, do not attempt to straighten it; replace the entire mounting assembly to ensure safety. A bent bracket will never provide the true, centered axis required for smooth operation.
Advanced Considerations: Sloped Ceilings and Downrods
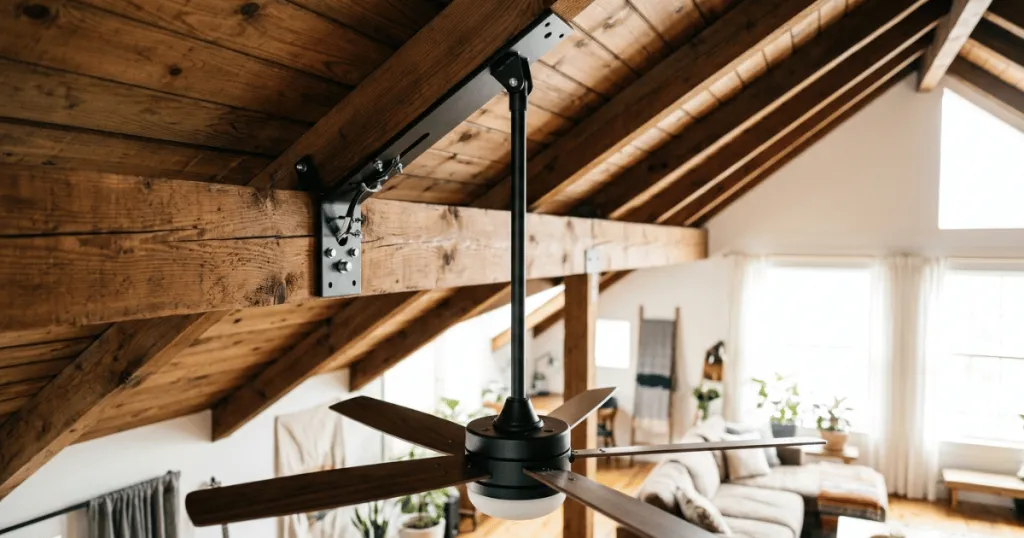
When installing a mounting bracket on a sloped ceiling, the orientation of the bracket is paramount. Most manufacturers specify that the bracket must be oriented so that the downrod hangs straight down, perpendicular to the floor, rather than following the angle of the ceiling. If the bracket is installed incorrectly on a slope, the downrod will bind against the bracket opening, leading to excessive noise and potential damage to the motor housing.
Always consult the installation manual for specific instructions regarding slope limitations. Some brackets are universal, while others require a specific ball-and-socket assembly to accommodate the angle. If you are using a long downrod, the leverage exerted on the mounting bracket increases significantly. Ensure your junction box is securely anchored to the joist, as the increased length of the downrod amplifies any minor instability in the mounting bracket.
Maintenance and Long-Term Stability
Even a perfectly installed bracket can loosen over time due to the natural expansion and contraction of building materials or the persistent vibration of the fan motor. It is a good practice to inspect the mounting bracket screws once a year, particularly after the first season of heavy use. If you notice any movement in the bracket, tighten the screws gently. Do not over-torque them, as this can strip the threads in the junction box.
If the screws seem loose, ensure the lock washers are still present and functioning. Maintaining the mechanical connection between the bracket and the junction box is the most effective way to prevent long-term issues like wobbling or motor noise. By prioritizing the bracket installation, you ensure that the rest of the fan assembly remains safe and quiet for years to come.
FAQ
Can I use a standard light fixture box for a ceiling fan?
No. Standard light fixture boxes are not designed to handle the weight or the dynamic torque of a ceiling fan. You must use a UL-listed, fan-rated junction box to prevent the fan from falling or causing structural damage to your ceiling.
What should I do if my ceiling fan wobbles after installation?
First, check that the mounting bracket is securely fastened and perfectly level. If the bracket is tight, ensure the fan’s downrod ball is correctly seated in the bracket’s cradle. If the mount is secure, the issue may be with blade alignment or balance.
Do I need to use a brace bar for my ceiling fan?
A brace bar is necessary if your existing junction box is not fan-rated or if the box is not positioned directly over a ceiling joist. It provides a secure, load-bearing anchor that spans the gap between two joists.