Key Takeaway: To determine the right size, calculate your room’s square footage by multiplying length by width. For rooms up to 75 sq. ft., use a 29-36 inch fan; 75-144 sq. ft. requires a 36-44 inch fan; 144-225 sq. ft. needs a 44-54 inch fan; and rooms over 225 sq. ft. typically require a 54-inch or larger fan.
Selecting the correct ceiling fan size is the most critical step in ensuring your space remains comfortable throughout the year. When you follow the proper measurement techniques, you achieve a balanced airflow that cools or circulates air without creating uncomfortable drafts or leaving stagnant pockets in the corners of your room. Properly sized fans operate more efficiently, run quieter, and integrate better into your home’s overall aesthetic.
By taking the time to accurately assess your square footage and ceiling height before you begin your search, you avoid the common pitfalls of choosing a unit that is either too small to be effective or too large for the room’s proportions. This guide provides the clear, actionable steps you need to determine the ideal fan diameter for any living space, bedroom, or home office, covering everything you need to know about How to Measure Your Room for the Right Fan Size.

Before You Start: Assessing Your Space
Before you pick up a tape measure, it is helpful to understand why size matters so much in the world of ceiling fans. A fan that is too small for a room will struggle to move enough air, forcing the motor to work harder and often leading to premature wear. Conversely, an oversized fan in a small room can create an overwhelming wind-chill effect, making the space feel drafty and uncomfortable rather than refreshing.
You should first identify the primary purpose of the room. A bedroom, where you might prefer gentle air movement for sleeping, has different requirements than a high-ceilinged great room where you need significant air displacement to combat heat stratification. Take a moment to look at your ceiling height as well. Standard ceilings are usually eight feet, but if you have vaulted, sloped, or low ceilings, your measurement strategy must adapt to ensure the blades remain at a safe distance from both the floor and the ceiling.
Gather your tools before beginning. You will need a reliable tape measure, a notepad, and a pencil. If your room is an irregular shape, such as an L-shaped living area or a space with alcoves, sketch the layout on your paper. Breaking complex rooms into smaller, rectangular sections allows you to calculate the total square footage more accurately. Remember that you are measuring the floor area that the fan is intended to serve, not necessarily the entire footprint of the house.
Tools and Prerequisites for Accurate Sizing
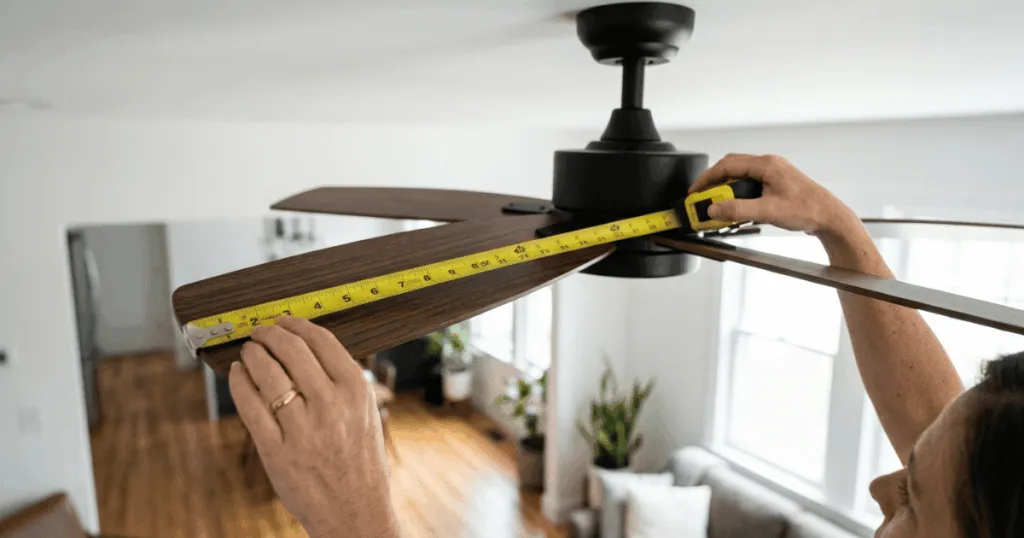
To get the most accurate results, ensure your measuring tape is taut. Sagging tape can lead to errors that, while seemingly small, can push you into the wrong fan category. If you are working alone, a laser distance measurer can be a helpful tool, though a standard metal tape measure is perfectly sufficient for most residential applications.
Beyond the floor dimensions, you must also account for the mounting height. The distance from the floor to the fan blades is a safety and performance factor. Most manufacturers recommend that blades be at least seven feet above the floor for optimal safety and airflow. If you have low ceilings, you will need to look for flush-mount or hugger-style fans. If your ceilings are higher than nine feet, you will need a downrod to bring the fan into the effective zone, which is generally considered to be eight to nine feet above the floor.
Finally, consider the location of your existing electrical junction box. If you are replacing an existing fixture, the box is already placed. If you are planning a new installation, ensure the box is rated for fan support. Measuring the room is only half the battle; ensuring the structure can support the weight and movement of the fan is a prerequisite that should never be ignored. If you are uncomfortable working with electrical wiring or mounting hardware, this is the point where you should consult a licensed electrician.
Step-by-Step: How to Measure Your Room for the Right Fan Size
Follow these steps to determine the exact fan diameter required for your specific room dimensions.
- Calculate the Total Square Footage: Measure the length and width of the room in feet. Multiply these two numbers together to get the total square footage. For example, a 12-foot by 15-foot room equals 180 square feet.
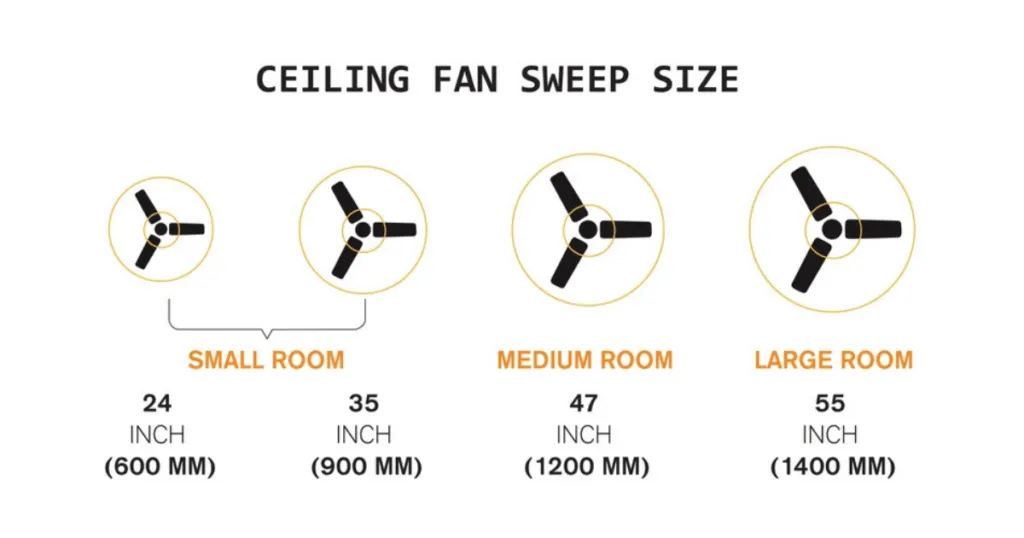
- Determine the Fan Diameter Category: Use your square footage to find the appropriate blade span. For rooms up to 75 square feet, a 29 to 36-inch fan is usually sufficient. Rooms between 75 and 144 square feet generally require a 36 to 44-inch fan. For larger rooms between 144 and 225 square feet, look for a 44 to 54-inch fan. For anything over 225 square feet, you should consider a 54-inch or larger fan.
- Verify Ceiling Height: Measure from the floor to the ceiling. If your ceiling is eight feet or lower, prioritize low-profile or hugger fans to maintain the required seven-foot clearance from the floor.
- Check for Obstructions: Measure the distance from the center of the room to the nearest wall, door, or cabinet. Ensure that the blade span you choose will not hit any objects when the fan is in motion. A good rule of thumb is to allow at least 18 to 24 inches of clearance between the blade tips and any wall or obstruction.
- Adjust for Large or Open Spaces: If you have an open-concept living area, you may need to use multiple fans to ensure consistent airflow across the entire space. In these cases, calculate the square footage for each specific seating or activity area rather than the entire open floor plan.
Understanding Blade Pitch and Airflow Efficiency
While diameter is the primary factor in sizing, blade pitch—the angle at which the blade is set—plays a vital role in how much air is actually moved. A blade pitch of 12 to 15 degrees is generally considered optimal for moving air efficiently. If you choose a fan with a very shallow pitch, it may spin quickly but move very little air, which can be noisy and ineffective. Conversely, a very steep pitch requires a more powerful motor to maintain speed. When measuring your room, consider that a larger room might benefit from a fan with a higher blade pitch to ensure air reaches the corners, whereas a smaller bedroom can function perfectly well with a standard pitch.
The Role of Ceiling Height and Downrod Length
Ceiling height is often the most overlooked factor in fan sizing. Many homeowners assume that if they have a high ceiling, they can simply install a massive fan. However, if the fan is mounted too high, the air will never reach the living level. The goal is to keep the blades between 8 and 9 feet from the floor. If you have a 10-foot ceiling, a 12-inch downrod is often necessary. For 12-foot ceilings, you may need an 18-inch or 24-inch downrod. Always check the manufacturer’s specifications for the minimum and maximum downrod lengths compatible with your specific fan model to ensure stability and safety.
Common Mistakes When Sizing Ceiling Fans
A frequent error is assuming that bigger is always better. While a large fan can move a lot of air, it may look disproportionate in a small bedroom or office, creating a visual imbalance that makes the room feel cramped. Stick to the recommended size ranges to maintain a sense of scale.
Another common mistake is neglecting the blade-to-ceiling clearance. If a fan is mounted too close to the ceiling, the blades cannot pull enough air, which significantly reduces the fan’s efficiency. Conversely, if a fan is mounted too low, it can create a safety hazard or cause the air to feel choppy. Always use the appropriate downrod length to keep the blades in the sweet spot of eight to nine feet from the floor.
Many homeowners also forget to account for the location of light fixtures or tall furniture. If you have a ceiling-mounted light fixture or a tall bookshelf, ensure the fan blades will not pass over them in a way that creates flickering shadows or physical interference. Planning for these environmental factors during the measurement phase saves you from having to relocate the fan after installation.
Troubleshooting Airflow Issues
If you have installed a fan and feel it is not providing the expected comfort, first check the direction of the blade rotation. During the summer, the blades should rotate counter-clockwise to push air downward, creating a cooling breeze. In the winter, switching to clockwise rotation at a low speed helps circulate warm air that has collected near the ceiling back down into the living space.
If the fan is the correct size but still feels ineffective, consider the blade pitch. A steeper blade pitch generally moves more air than a flatter blade. If you find your room is still stuffy, the issue might not be the fan size, but rather the lack of air exchange in the room. Ensure that windows or doors are positioned to allow for cross-ventilation, which works in tandem with the fan to keep the air fresh.
If you notice the fan wobbling, this is rarely a sizing issue and almost always a balance issue. Check that all blade screws are tightened securely and that the mounting bracket is firmly attached to the junction box. If the wobble persists, you may need a blade balancing kit. Remember that proper measurement is the foundation, but correct installation is what ensures that the fan functions as intended for years to come.
Strategic Placement for Maximum Comfort
Beyond just the size of the fan, the placement within the room dictates the quality of the experience. In a rectangular room, the fan should ideally be centered over the primary seating area or the bed. If the room is very long, consider installing two fans to prevent “dead zones” where the air remains stagnant. When measuring for two fans, divide the room into two equal zones and treat each as a separate space for sizing purposes. This approach ensures that both fans are sized correctly for their specific coverage area, leading to a much more uniform temperature throughout the entire room.
Final Checks Before Purchasing
Before finalizing your choice, double-check your measurements against the manufacturer’s “spec sheet.” Every fan model has a specific airflow rating measured in CFM (Cubic Feet per Minute). While diameter is a great starting point, the CFM rating tells you the actual volume of air the fan can move. A high-quality fan in the correct size category will provide better, quieter performance than a budget-tier fan that is technically the right size but underpowered. By combining your room measurements with the manufacturer’s CFM data, you ensure that your investment provides lasting comfort and efficiency for your home.
FAQ
Does ceiling height change the fan size I need?
Ceiling height does not change the diameter of the fan you need, but it dictates the mount type. High ceilings require longer downrods to bring the fan into the effective airflow zone, while low ceilings require flush-mount or hugger fans to maintain safety clearance.
Can I use two small fans instead of one large one?
Yes, in large or long rooms, using two smaller fans is often more effective than one massive fan. This helps distribute airflow more evenly across the entire space and prevents dead zones.
What happens if I choose a fan that is too large for my room?
An oversized fan can make a room feel cluttered and may create an uncomfortable, gusty wind-chill effect. It can also overwhelm the visual proportions of the space, making the room feel smaller than it actually is.
How much clearance do I need from the walls?
You should maintain at least 18 to 24 inches of clearance between the tips of the fan blades and the nearest wall or obstruction to ensure proper air circulation and safety.