Many homeowners assume that a ceiling fan losing its high speed or failing to switch settings permanently needs a brand new motor. When a fan starts crawling along on high or refuses to spin past a low hum, the culprit is often much simpler than a total motor failure. Inside the upper housing sits a small electronic component responsible for managing electrical current to the motor windings. Over years of operation, this part degrades, leading to sluggish performance or complete stoppage.
It is easy to assume that any drop in rotational velocity means the entire fixture has reached the end of its lifespan. In practice, however, mechanical motors outlast their electrical support components by a significant margin. Understanding how replacement capacitors function helps you diagnose common motor issues without rushing into expensive hardware swaps. This article examines why these components fail, how to identify the correct specifications for your specific unit, and what steps keep your air moving efficiently through every season.
The Core Functions of Ceiling Fan Capacitors
Ceiling fan motors rely on alternating current to create rotating magnetic fields. Single-phase induction motors cannot start spinning on their own without an external phase shift. This is where the ceiling fan capacitor comes into play, storing and releasing electrical energy to give the motor the initial push and continuous running torque it needs. Without this steady phase assistance, the motor simply hums and generates heat instead of turning the blades.
Most modern residential fans utilize a dual-run capacitor or a combination block containing multiple microfarad ratings housed inside a plastic or metallic casing. Each rating corresponds to a specific speed setting on your wall control or pull chain. When one section of the internal component burns out or loses its capacitance value, you might lose the high speed while medium and low continue to work. When the primary running section fails entirely, the fan stops responding to speed commands altogether.
Microfarad Ratings and Voltage Tolerances
Every component is manufactured with strict microfarad ratings and voltage limits. Common residential ratings for standard indoor fans range from 1.5uF to 5uF, often split into dual or triple values such as 4.5uF plus 5uF or 3uF plus 6uF. Matching these numbers precisely is vital for proper motor operation. Installing an incorrect rating can cause the motor to run hotter than designed, hum loudly, or fail to achieve rated air delivery.
Voltage ratings usually sit at 250V or 350V AC. You can safely install a component with a higher voltage rating than the original factory part, but you should never install a lower voltage rating. Higher voltage tolerance simply means the dielectric material inside can handle electrical surges more effectively without breaking down prematurely.
When selecting a new unit, paying close attention to these electrical parameters prevents unexpected failures. A mismatch in microfarad ratings will alter the phase shift supplied to the motor windings. If the rating is too low, the motor lacks the necessary torque to spin the blades at their intended velocity. If the rating is too high, excessive electrical current flows through the coils, causing thermal overload and premature insulation breakdown. Always cross-reference the printed label on your old component rather than relying on guesswork or general assumptions about fan sizes.
Physical Form Factors and Wiring Configurations
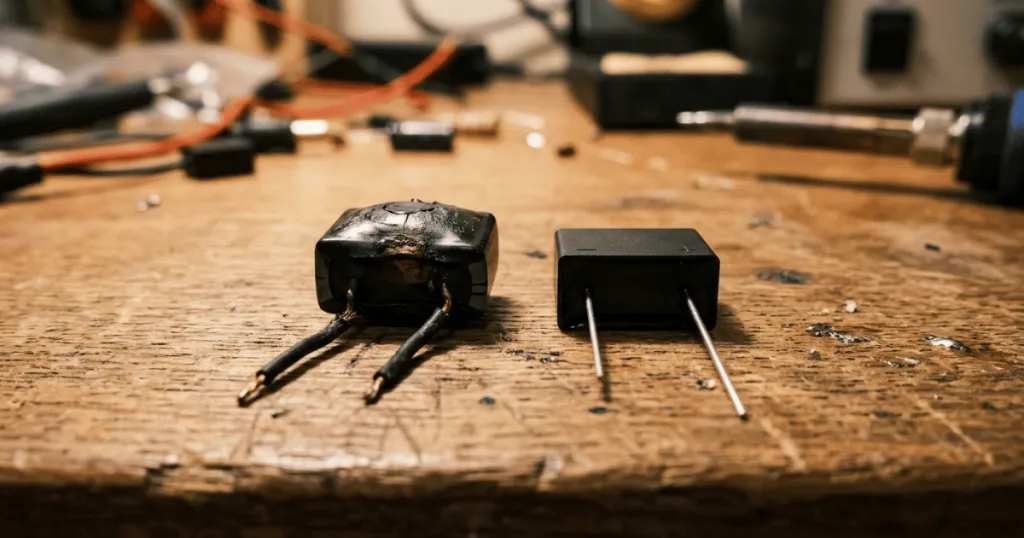
Beyond electrical ratings, the physical shape and wire count matter significantly during a motor speed repair. Some components feature two loose wires, while others use a wire harness with a plastic plug connector. Rectangular block styles and cylindrical styles are both common, and your choice must fit comfortably within the narrow space of the switch housing or upper canopy.
Wire color coding also guides the installation process. Although wire colors can vary between manufacturers, the main leads typically connect to the power supply from the speed switch and the specific motor windings. Keeping track of these connections through notes or reference photographs ensures the fan operates correctly after reassembly.
Working within a cramped switch housing requires patience and careful wire management. Many residential fans pack tight clusters of wire nuts, capacitor leads, and switch terminals into a very small metallic or plastic cup. Before inserting the new part, verify that all stripped wire ends are fully inserted into their connectors and secured with wire nuts or electrical tape where appropriate. Loose connections can introduce high electrical resistance, generating localized heat that melts wire insulation and triggers another component failure shortly after the repair.
Diagnosing Failed Components in Everyday Room Scenarios
Recognizing the early warning signs of electrical degradation saves you from unnecessary troubleshooting steps. In a typical living room or bedroom setting, a failing component usually announces itself through distinct behavioral changes in the fan. If your bedroom fan takes several minutes to reach its usual rotational speed after you pull the chain, the internal storage medium is losing its efficiency.
Another common scenario involves a fan that hums loudly when you select high speed, but if you manually push the blades to start, it spins up slowly. This manual-start symptom is a textbook indicator that the starting section of the unit has degraded to the point where it can no longer overcome initial stationary resistance. In contrast, if the fan works perfectly on low and medium but refuses to spin on high, a specific microfarad leg inside the housing has likely opened up internally.
Temperature and environmental humidity also influence component lifespan. Fans installed in covered outdoor patios or damp rooms experience thermal cycling that degrades internal plastic seals and dielectric fluids faster than units in climate-controlled indoor spaces. When inspecting a suspected failure, look for visual signs such as a bulging plastic casing, a cracked body, or a noticeable acrid burning smell when power is applied.
Fan motor troubleshooting also requires distinguishing between mechanical friction and electrical faults. If a fan feels stiff when you spin the blades by hand while the power is off, the issue likely involves dry or worn-out motor bearings rather than a faulty capacitor. Conversely, if the blades spin freely by hand but refuse to maintain speed under electrical power, you can safely focus your attention on electrical testing. Taking time to isolate the root cause prevents you from replacing a perfectly good part while ignoring a mechanical seizing problem.
Why Electrical Maintenance Matters for Long-Term Home Comfort
Maintaining the electrical health of your ceiling fans directly impacts household energy efficiency and indoor comfort. A motor struggling against a failing capacitor draws abnormal amounts of electrical current while producing minimal airflow. This inefficiency generates excess heat in the motor windings, which can eventually damage the internal copper insulation and ruin the entire appliance.
Addressing minor electrical symptoms early preserves the mechanical integrity of the motor bearings and switch assemblies. It transforms a potentially hazardous overheating situation into a straightforward, inexpensive fix. Replacing a worn component restores proper torque, reduces annoying electrical hums, and ensures your fans deliver optimal cubic feet per minute of airflow for daily temperature regulation.
From an editorial standpoint, treating these components as consumable maintenance items rather than permanent parts changes how you manage household fixtures. Just as you replace HVAC air filters or lighting elements, keeping an eye on motor performance guarantees reliable operation across every season. Homeowners who proactively address sluggish speeds protect their investment in high-quality architectural hardware and avoid the labor-intensive chore of unhanging heavy motor assemblies from ceiling joists.
Common Misconceptions About Motor Electrical Parts
Many DIY enthusiasts assume that any electrical component of the same physical size will work inside a ceiling fan housing. This assumption frequently leads to purchasing parts with incorrect microfarad specifications, which can strain the motor windings or fail to correct the speed issue. Always verify the stamped technical data on the original housing rather than guessing based on physical dimensions alone.
Another widespread myth is that a totally dead fan always points to a burnt-out motor. While motor coil burnouts do happen, they are less common than simple component failures or loose wire connections. Taking the time to test continuity and inspect the upper housing before discarding a fixture prevents needless replacements and keeps functional hardware in service.
Finally, some homeowners believe that capacitors store electrical energy indefinitely even after the power is switched off. While they do hold a charge while operating, standard ceiling fan components typically discharge rapidly through the motor windings once power is cut. Nevertheless, practicing safe electrical habits by turning off the wall switch and breaker remains an essential precaution before touching any internal wiring.
FAQ
How do I know if my ceiling fan needs a new capacitor?
Common signs include a fan that hums on high speed but will not spin unless manually pushed, a fan that takes a long time to reach full speed, or a unit where high speed no longer works while lower speeds function normally.
Can I use a capacitor with a different microfarad rating?
No. You should always match the microfarad (uF) rating of the original component precisely. Using an incorrect rating can cause the motor to overheat, hum loudly, or fail to deliver adequate airflow.
Is it safe to replace a ceiling fan capacitor myself?
Yes, many DIY homeowners complete this repair by turning off the power at the wall switch and circuit breaker, taking reference photos of the wiring, and installing an exact match component inside the upper housing.