Quick Answer: To oil a ceiling fan, turn off power at the circuit breaker, locate the oil port on top of the motor housing, remove the fill screw, add two to three drops of non-detergent SAE 10 or SAE 20 electric motor oil, let it absorb for a few minutes, and reinstall the screw before testing the fan.
When you follow the proper maintenance steps for how to oil a ceiling fan, you will eliminate annoying squeaks, reduce motor friction, and ensure your fixture runs quietly and efficiently for years. Many homeowners overlook regular lubrication until a persistent hum or squeak interrupts the quiet in a bedroom or living space. Addressing this mechanical need before the bearings run completely dry prevents premature wear and saves you from the expense of a full replacement.
Modern ceiling fans vary significantly in their internal design. Knowing what your specific model requires before you touch a drop of lubricant protects your investment and keeps your home comfortable year-round.
Before You Start: Assessing Your Fan and Lubrication Needs
Before you climb a ladder, you need to determine whether your specific ceiling fan actually requires oil. A common mistake is attempting to lubricate sealed or direct-drive fan motors that do not have oil ports. Applying oil to the exterior housing of a sealed motor does nothing to help internal components, and excess liquid can drip onto furniture or attract dust.
Check your owner manual or look at the top housing above the motor blades. Older models, particularly heavy industrial fans, vintage units, and select high-end pull-chain designs, often feature a small oil hole labeled specifically for lubrication. If your fan was manufactured within the last fifteen to twenty years and uses a sealed permanent-split capacitor motor or a modern DC motor, it features permanently sealed bearings. These modern units require no liquid maintenance at all.
Understanding the distinction between traditional oil-lubricated motors and modern sealed units is critical for preventing accidental damage. Traditional cast iron motors, commonly found in vintage or premium heritage models, rely on an internal oil bath system. These units have specific oil filler ports explicitly designed to replenish the lubrication cycle over decades of operation. In contrast, modern low-profile or smart ceiling fans use factory-sealed ball bearings packed with synthetic grease that cannot be refilled from the outside.
Attempting to force oil into a sealed bearing housing often breaches the protective seals, which forces factory lubrication out and introduces damaging airborne contaminants into the raceway. Take time to inspect the manufacturer stamp or model number plate usually located on the top of the motor housing before proceeding with any maintenance task.
If you confirm your fan has an oil port, the next step is selecting the correct lubricant. Never use standard vegetable oil, cooking spray, or heavy automotive motor oil. These substances quickly gum up, attract dust, and eventually seize the delicate internal bearings. Instead, use non-detergent SAE 10 or SAE 20 electric motor oil. Sewing machine oil also works well in a pinch because it flows thinly and leaves no sticky residue behind.
Tools, Context, and Prerequisites
Gathering the right supplies before you start prevents awkward balancing acts on a ladder. Having everything within arm’s reach ensures a smooth, efficient process from start to finish.
-
Sturdy step ladder: Position it securely on a flat, level floor so you can reach the motor housing comfortably without overreaching.
Drop cloth or old towels: Place these directly beneath the fan to catch any accidental drips of oil before they stain your flooring or furniture.
Non-detergent SAE 10 or SAE 20 electric motor oil: Keep the bottle or an oil can with a narrow spout ready for precise application.
Clean microfiber cloths or rags: Use these to wipe away accumulated dust around the motor housing and clean up any excess lubricant.
Screwdriver: Have a standard or Phillips head driver on hand in case you need to remove a decorative cover plate to access the oil port.
Plan to spend about twenty to thirty minutes on this task. Taking your time prevents accidental spills and ensures you apply just the right amount of fluid to the internal reservoirs.
Preparation extends beyond physical tools and includes evaluating the environmental context of the room where the fan operates. Ceiling fans installed in high-humidity spaces like kitchens or covered outdoor patios accumulate grease, smoke, and moisture mixed with everyday household dust. Before applying any fresh oil, inspect the exterior casing for stubborn grime that might fall into the oil port during the removal of the filler screw. Using a damp microfiber cloth with a mild, residue-free cleaner ensures the immediate area around the port is pristine. Furthermore, ensure the room temperature is moderate because extreme cold can thicken electric motor oil temporarily, making it difficult to assess how much fluid has actually entered the internal felt reservoir during application.
Step-by-Step Instructions: How to Oil a Ceiling Fan
Executing this maintenance process requires a methodical approach. Follow these numbered steps in sequence to lubricate your fan safely and effectively.
- Turn off power completely: Shut off the wall switch and trip the circuit breaker that controls the fan. Never rely solely on the pull chain to cut power when working near moving electrical components.
- Test the blades: Wait for the blades to come to a complete stop. Flick the wall switch or pull the chain to verify that no power reaches the unit before you touch any metal parts.
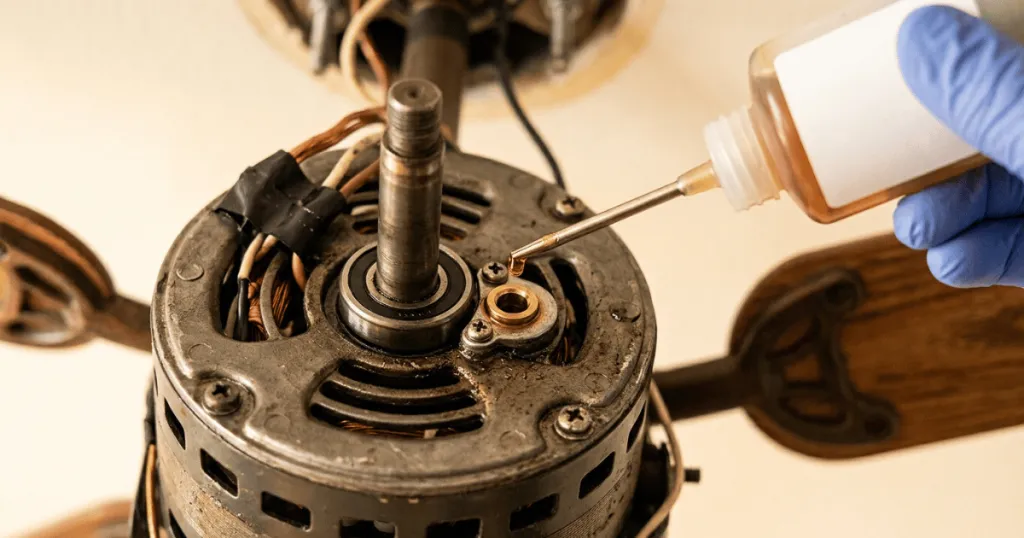
- Locate the oil hole: Climb your ladder and inspect the top motor housing, often situated just above the mounting bracket or switch housing. Look for a small port labeled oil hole or oil down.
- Remove the oil hole screw: If the port has a small retaining screw, use your screwdriver to remove it carefully. Place the screw in a safe spot, such as your pocket or a small tray, so it does not fall to the floor.
- Apply the correct amount of oil: Insert the nozzle of your oil can or bottle into the port. Squeeze gently to add just a few drops, usually two to three drops maximum, into the reservoir. Do not overfill the port, as excess fluid will overflow into the motor housing.
- Wait for absorption: Allow a few minutes for the non-detergent electric motor oil to soak down into the felt-lined bearing assembly before turning the fan back on.
- Reinstall the screw and clean up: Replace the oil port screw securely. Use a clean cloth to wipe away any stray drips on the outer housing.
- Test the fan operation: Restore power at the circuit breaker. Turn the fan on at its lowest speed setting to let the fresh oil distribute evenly across the bearing surfaces before ramping up to higher speeds.
Common Mistakes to Avoid
Several frequent errors can turn a simple maintenance task into a messy headache or a damaged appliance. Avoiding these missteps protects both your home and your hardware.
The most widespread error is using the wrong type of lubricant. Homeowners often grab a can of multipurpose spray lubricant or heavy machine oil from the garage. These products contain solvents or additives that break down over time, leaving a gummy residue that binds the bearings instead of freeing them.
Another common mistake is over-lubricating. Pouring too much oil into the port does not make the fan run better or quieter. Excess oil simply overflows the internal reservoir, leaks down the downrod, and spatters across your ceiling or furniture the moment you turn the motor back on.
Skipping the power cutoff step at the breaker panel introduces unnecessary electrical risk. Always kill power at the source rather than just turning off the wall switch to guarantee complete safety while your hands are inside the housing.
Another overlooked mistake involves rushing the absorption phase. Homeowners frequently inject the oil and immediately power the fan back on at high speed, which centrifugal force uses to fling the unabsorbed liquid straight out of the reservoir before it reaches the friction points. Patience during the waiting period allows the felt wick inside traditional motors to fully saturate. Additionally, ignoring the condition of the oil port screw can lead to rattles later; if the threading is stripped or the gasket washer is missing, air currents generated by the motor can cause the screw to loosen over time and fall into a living space below.
Troubleshooting Noise and Performance Issues
If you have successfully oiled your fan and still hear an annoying sound, the issue likely stems from a different mechanical problem. Lubrication only solves bearing friction.
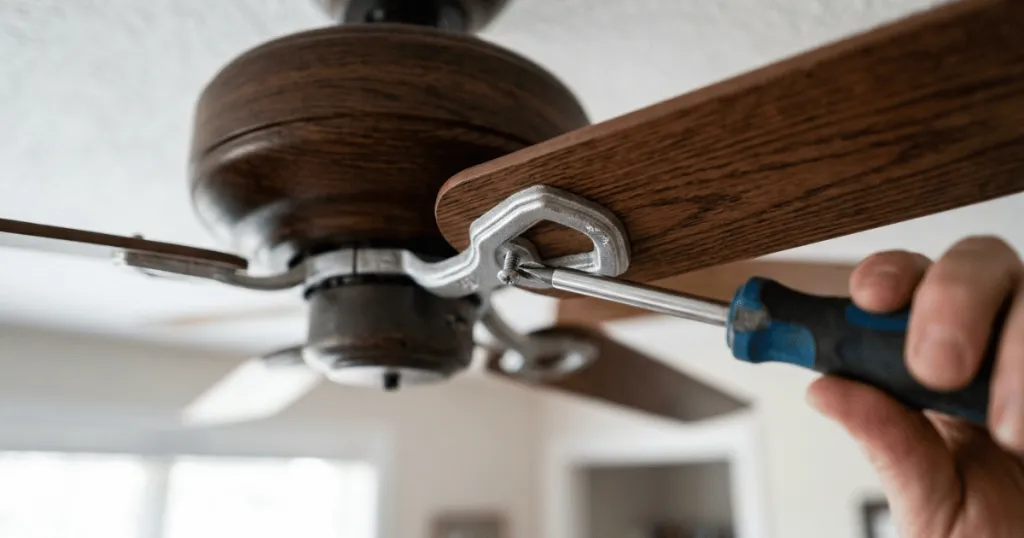
If you hear a rhythmic ticking or clicking sound, the issue is usually related to loose blade screws or an unbalanced blade assembly. Check every screw connecting the blade irons to the motor hub and tighten any that have vibrated loose over time. A wobbly blade can also strike the decorative housing, creating a repetitive thumping noise.
If you hear a low electrical hum, the problem might be tied to your wall dimmer switch. Standard incandescent dimmers often cause ceiling fan motors to buzz due to electrical interference. Upgrading to a dedicated ceiling fan speed control switch typically resolves this issue instantly.
When grinding or squealing persists despite proper lubrication and tight mounting hardware, the motor bearings may be worn out beyond repair. In such cases, replacing the ceiling fan is the most practical and cost-effective solution.
Knowing when to stop and seek professional help prevents wasted effort. If your fan exhibits frayed wiring, a smoking motor, or structural damage to the mounting bracket, disconnect power and consult a licensed electrician or replace the unit entirely.
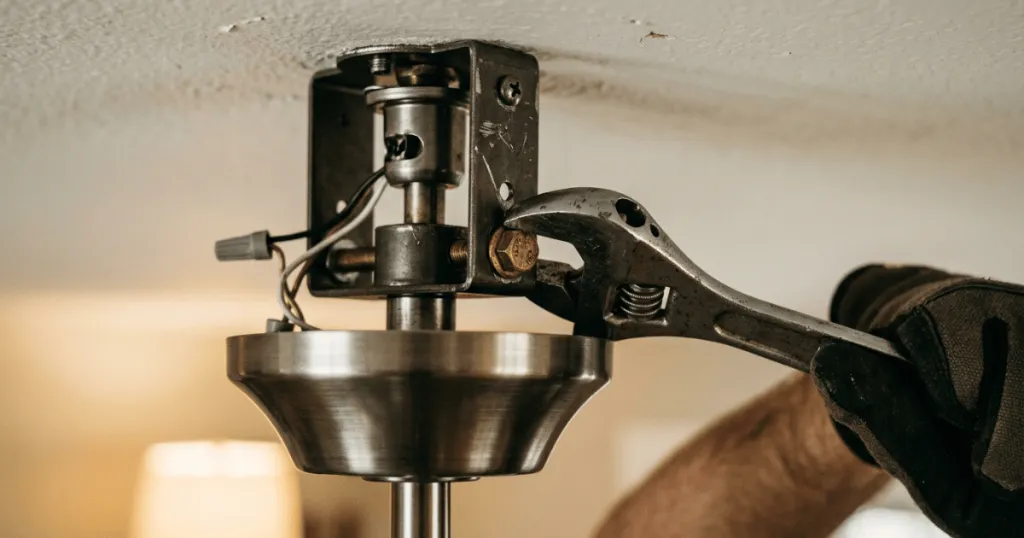
When troubleshooting persistent ceiling fan noise, evaluating the structural connection to the ceiling box is equally important. A loose canopy or a mounting bracket that lacks secure attachment to a ceiling joist can amplify normal motor vibrations into loud rattling noises that mimic internal mechanical failure. Always verify that the hanging ball sits correctly in the mounting bracket slot and that all downrod set screws are torqued down firmly. Taking a systematic approach to these secondary hardware checks ensures that every potential source of noise is addressed alongside your motor lubrication efforts.
FAQ
How often should I oil a ceiling fan?
Most lubricated ceiling fans require maintenance once a year. If you run your fan continuously or live in a dry, dusty climate, check the oil levels every six months.
Can I use WD-40 to lubricate my ceiling fan?
No. WD-40 is a water-displacing solvent, not a true lubricant. It will temporarily silence a squeak by dissolving old grime, but it quickly evaporates and leaves bearings bone dry and vulnerable to damage.
What happens if I put too much oil in the ceiling fan?
Excess oil overflows the internal reservoir and leaks out of the motor housing. This creates a mess by dripping onto the blades, light fixtures, furniture, and flooring below.