When a ceiling fan begins to behave erratically, homeowners often assume the motor has burned out or the wall switch is faulty. In many cases, however, the culprit is a small, inexpensive component hidden inside the fan housing. Recognizing the Signs of Capacitor Failure early can save you from replacing an entire unit when a simple, low-cost repair would suffice.
A capacitor acts as a temporary energy storage device that provides the initial jolt of power needed to get the fan motor spinning. Because it handles significant electrical stress every time you turn the fan on, it is often the first part to degrade. Understanding how this component functions and how it signals its end of life is essential for any DIY-minded homeowner looking to maintain their home’s comfort systems.
The most immediate sign of a failing capacitor is a fan that refuses to start on its own but will spin if given a manual push. This happens because the capacitor provides the phase shift necessary to create a rotating magnetic field in the motor. A weakened unit lacks the torque to overcome the initial inertia of the fan blades. If you notice your fan humming or vibrating when you flip the switch, but the blades remain stationary until you nudge them, the capacitor is the primary suspect.
Understanding the Primary Signs of Capacitor Failure
The most common indicator that a capacitor is failing is a fan that refuses to start on its own but will spin if given a manual push. Because the capacitor provides the phase shift necessary to create a rotating magnetic field in the motor, a weakened unit lacks the torque to overcome the initial inertia of the fan blades. If you notice your fan humming or vibrating when you flip the switch, but the blades remain stationary until you nudge them, the capacitor is the primary suspect.
Inconsistent Speed and Performance
Beyond a complete failure to start, a degrading capacitor often manifests as a loss of power across all speed settings. You might notice that your fan no longer reaches its expected high speed, or that the difference between the low, medium, and high settings has become negligible. This occurs because the capacitor is no longer able to maintain the correct current flow to the motor windings, resulting in sluggish performance that feels weak or underpowered.
In many cases, the fan may start on high but fail to turn on lower settings. This happens because the capacitor is responsible for regulating the electrical current that determines the speed of the motor. When the internal dielectric material begins to break down, the capacitor loses its ability to store the precise amount of energy required for each speed setting. You may find that the fan only operates at one speed regardless of the wall control or pull chain position. This is a clear sign that the internal wiring of the capacitor has developed a fault.
Audible Humming Without Movement
A persistent, low-frequency hum coming from the motor housing is a classic symptom. When the capacitor fails, the electrical current enters the motor but cannot effectively transition into mechanical motion. This creates a magnetic stall where the motor windings are energized but the rotor cannot turn. If you hear this sound, turn the fan off immediately to prevent the motor from overheating, as the excess current can damage the internal wiring if left in this state for too long.
It is important to distinguish this hum from the mechanical noise of a loose screw or a misaligned blade. A mechanical noise usually sounds like rattling or clicking. A capacitor-related hum is a steady, electrical vibration that sounds like a transformer under load. If you touch the motor housing and feel a steady, intense vibration without any rotation, the motor is likely stalled due to a lack of starting torque. This condition is dangerous for the motor windings because they are designed to move air to stay cool. Without movement, the heat builds up rapidly.
Real-World Context and Diagnostic Factors
In practice, not every fan issue is a capacitor problem. Ceiling fans are complex electromechanical systems, and environmental factors play a significant role in component longevity. High humidity, for instance, can accelerate the degradation of the internal dielectric material within the capacitor. If your fan is installed on a covered porch or in a damp climate, the capacitor may fail sooner than one in a climate-controlled living room.
Another factor is the age and quality of the fan. Older fans often utilized capacitors that were not as robust as modern standards. Furthermore, if your fan is frequently left on for long durations, the heat generated by the motor can eventually dry out the components inside the capacitor. This is why you might notice that the fan works fine for the first hour of the day but begins to slow down or struggle after it has been running for several hours and the housing has warmed up.
Consider the installation environment as part of your diagnostic process. Fans in kitchens or bathrooms are exposed to grease and moisture, which can penetrate the housing and affect the electrical components. If you live in a region with frequent power surges or unstable voltage, the capacitor may experience premature wear. These external stressors are often overlooked, but they contribute significantly to the overall lifespan of the fan speed control system.
Assessing the Physical Condition
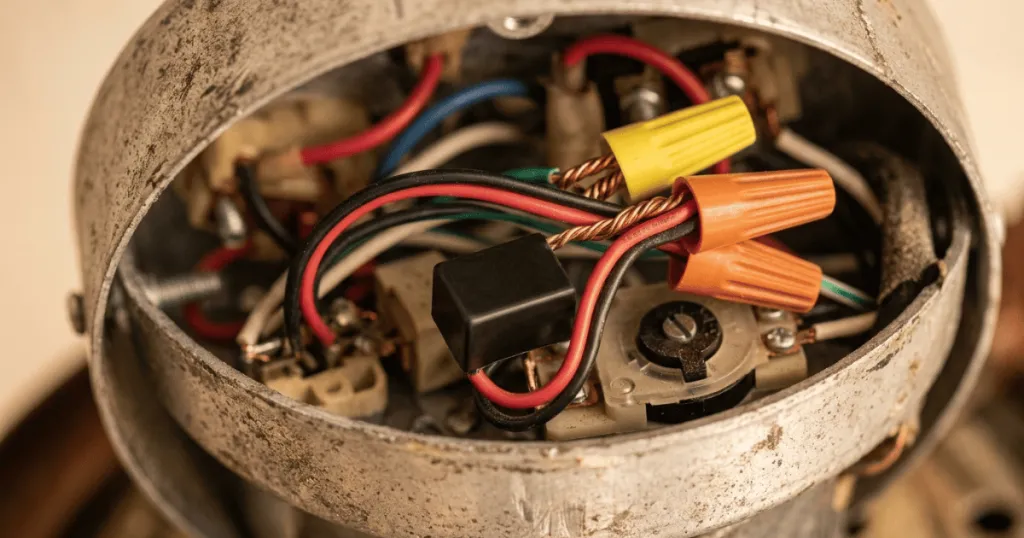
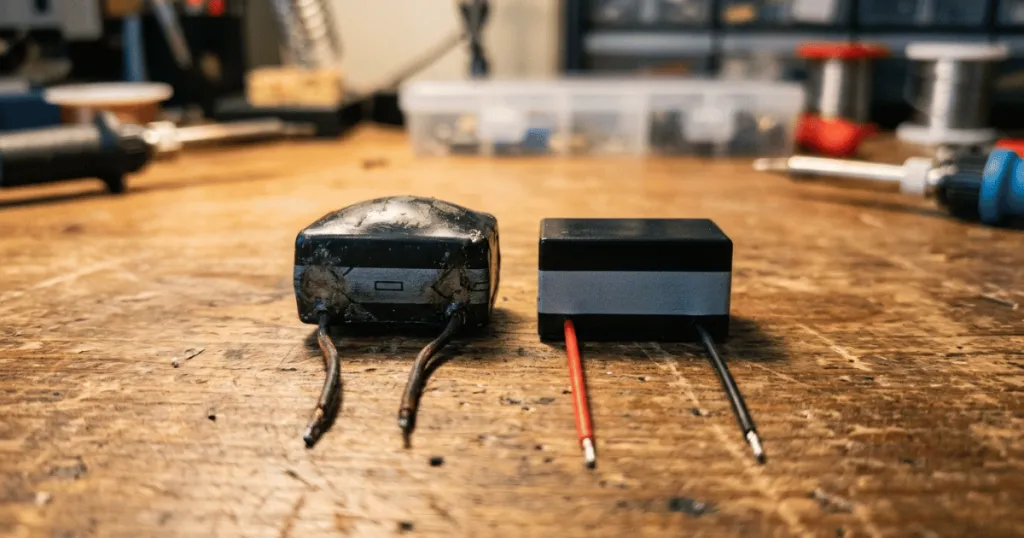
If you are comfortable opening the fan housing, a visual inspection can often confirm your suspicions. A failing capacitor will sometimes show physical signs of distress. Look for a bulging top, a leaking oily substance, or a burnt smell emanating from the component itself. These are clear indicators that the internal chemistry has broken down due to electrical overload or thermal stress. If the capacitor looks clean but the fan still exhibits the symptoms mentioned above, it may still be internally shorted or open, requiring a replacement to restore normal function.
When inspecting the capacitor, look for the wiring connections as well. Sometimes, the issue is not the capacitor itself but the wire nuts or connectors that have loosened over time due to the constant vibration of the motor. Ensure that all connections are tight and free of corrosion. If you see signs of melting or discoloration on the plastic housing of the capacitor, this is a definitive sign that the part has reached the end of its service life and must be replaced immediately to avoid a fire hazard.
Why Identifying Capacitor Issues Matters
Understanding these signs matters because it changes how you approach home maintenance. Many homeowners mistakenly believe that a sluggish or non-starting fan is a sign that the entire motor is dead. This leads to unnecessary waste, as they discard a perfectly good fan fixture when a ten-dollar part could have extended its life by several years. By learning to identify the symptoms, you empower yourself to make informed decisions about whether to repair or replace.
Furthermore, safety is a significant consideration. A failing capacitor that causes a motor to hum and stall is drawing energy that is being converted into heat rather than motion. If ignored, this heat can damage the motor windings, turning a simple capacitor replacement into a full motor failure. Addressing the issue early preserves the integrity of the motor and prevents the risk of overheating within the ceiling mounting box, which is a critical safety benefit for any electrical appliance.
Preventative maintenance is the best strategy for long-term fan ownership. By keeping the fan blades clean and ensuring the mounting hardware is secure, you reduce the load on the motor. This, in turn, reduces the stress placed on the capacitor. When you notice the first signs of performance degradation, treat it as a warning sign. Waiting until the fan stops working entirely often makes the diagnostic process more difficult because the motor may have sustained secondary damage.
Common Misconceptions About Fan Performance
A frequent misconception is that a fan that hums is always a sign of a bad motor. While a bad motor is possible, it is statistically less common than a capacitor failure. Motors are generally robust and built to last for decades, whereas capacitors are consumable parts designed with a finite lifespan. Do not jump to the conclusion that you need a new fan before you have ruled out the capacitor, as this is the most common diagnostic error made by homeowners.
Another misunderstanding is the belief that a fan with a remote control does not have a capacitor. Almost all AC-powered ceiling fans, whether controlled by a wall switch or a remote receiver, rely on a capacitor to manage motor speed and startup torque. If your remote-controlled fan is acting up, the capacitor is likely located inside the receiver unit or tucked near the motor housing. Always check the manufacturer documentation to locate the specific capacitor for your model before assuming the remote electronics are the only point of failure.
Some homeowners also believe that a fan that spins slowly is simply dirty or needs oil. While lubrication can help with older fans that have oil ports, it does not address the electrical side of the equation. If the fan is clean and the bearings seem to move freely when turned by hand, the issue is almost certainly electrical. Focusing on the capacitor is the most logical step in your troubleshooting workflow because it is the most likely point of failure in the speed control circuit.
Conclusion: When to Take Action
Recognizing the Signs of Capacitor Failure is the first step in maintaining your home’s cooling efficiency. If your fan requires a manual push to start, exhibits sluggish speeds, or produces a persistent hum, you are likely dealing with a faulty capacitor. By addressing these symptoms promptly, you avoid the cost of replacing the entire fixture and protect your fan’s motor from further damage. When in doubt, consulting the manufacturer’s manual for your specific model will help you locate the part and confirm the correct specifications for a replacement, ensuring your fan returns to quiet, reliable operation.
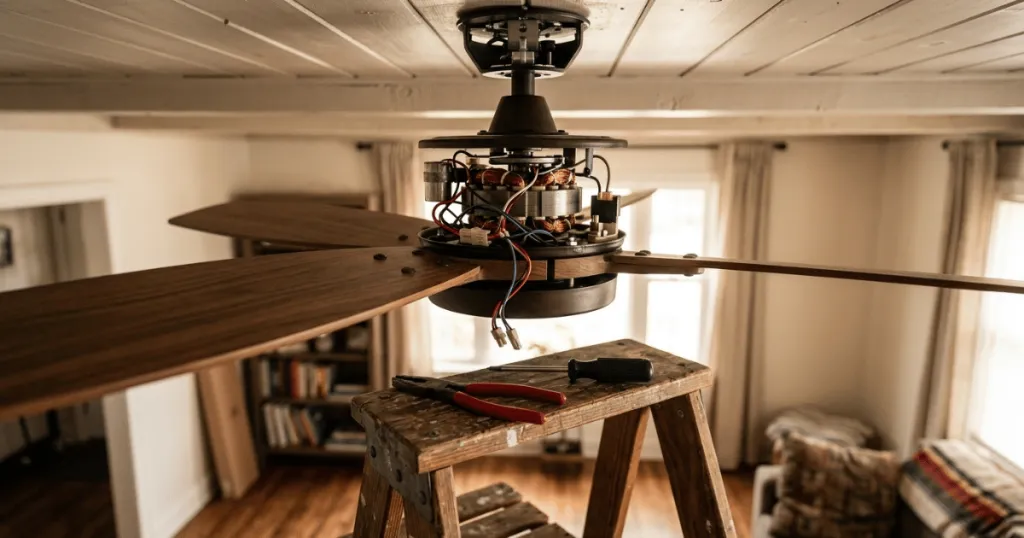
Taking action early is the hallmark of a responsible homeowner. When you replace a capacitor, you are not just fixing a minor annoyance. You are extending the life of your appliance and reducing the environmental impact of unnecessary waste. Keep your tools ready, follow the safety protocols, and you will find that most ceiling fan issues are well within the reach of a standard DIY repair.
FAQ
Can I replace a ceiling fan capacitor myself?
Yes, replacing a capacitor is a standard DIY task for most homeowners. It involves turning off the power, accessing the fan housing, and swapping the old capacitor for one with the exact same electrical specifications. Always ensure you have the correct microfarad (uF) rating and voltage before purchasing a replacement.
How do I know which capacitor to buy for my fan?
The necessary information is printed directly on the side of the existing capacitor. You must match the microfarad (uF) rating exactly, as well as the voltage rating. If the uF rating is different, the fan speeds will not function correctly, and you risk damaging the motor.
Is a humming sound always a sign of capacitor failure?
While a humming sound is one of the primary Signs of Capacitor Failure, it can also be caused by loose mounting hardware, a faulty wall dimmer switch, or a failing motor bearing. If the fan spins freely by hand but hums when powered, the capacitor is the most likely cause.