At a Glance: If your ceiling fan is not working, start by checking the circuit breaker and wall switch to ensure power is reaching the unit. If power is confirmed, test the remote control batteries and verify the synchronization between the remote and the internal receiver. Other common causes include a faulty motor capacitor, a broken pull chain switch, or loose wiring connections within the fan canopy.
When you flip a wall switch or press a remote button and nothing happens, the frustration is immediate. Asking yourself, “Why is my ceiling fan not working,” is a common experience for homeowners because these fixtures sit at the intersection of mechanical, electrical, and control systems. Often, the culprit is something as simple as a tripped breaker or a dead battery, but the complexity of modern fans with integrated light kits and wireless receivers can make the diagnosis feel more daunting than it actually is.
Before you climb a ladder or reach for a screwdriver, it is helpful to understand that most ceiling fan failures stem from a few predictable points of failure. By systematically checking the power supply, the control interface, and the internal connections, you can usually identify the issue without needing a professional electrician. This guide helps you navigate these components to determine whether you are dealing with a minor maintenance task or a more significant mechanical fault.
Troubleshooting requires a methodical approach. Start by isolating the variables. Does the light work but not the fan? Does the fan make a sound but fail to rotate? These specific symptoms act as diagnostic clues that narrow down the list of potential culprits. By observing the behavior of the fan under different conditions, you can save significant time and avoid unnecessary disassembly of the fixture.
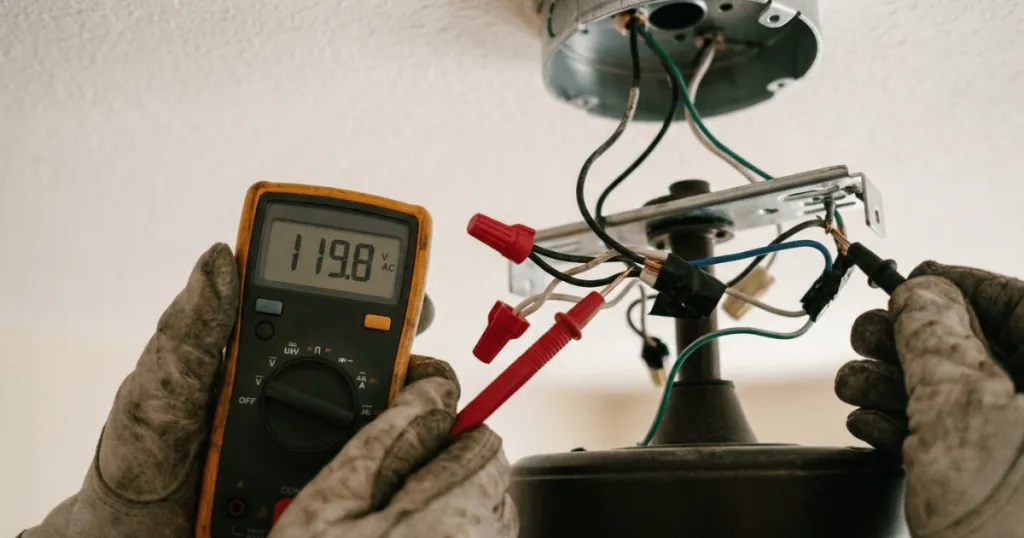
Understanding Why Is My Ceiling Fan Not Working
The most frequent reason a ceiling fan stops functioning involves an interruption in the power supply. Even if the light kit still illuminates, the motor might not receive the necessary current to engage. This often points to a specific issue within the fan housing or the wall switch circuit rather than a total loss of power to the room.
Power Supply and Circuit Breakers
Start your investigation at the main electrical panel. It is surprisingly common for a circuit breaker to trip, cutting power to the fan while leaving other outlets in the room unaffected. If the breaker is in the off or neutral position, reset it fully before checking the fan again. Additionally, ensure that the wall switch is firmly in the on position. Some fans are controlled by a dual-switch setup where one switch handles the light and the other manages the motor; if one is off, the fan may appear broken.
Beyond the breaker, consider the wall control itself. If you have a dimmer switch installed, it may be incompatible with your ceiling fan motor. Many modern fans, especially those with DC motors, require a specific type of control. If a standard incandescent dimmer was used, it can cause the fan to hum, vibrate, or refuse to start entirely. Replacing an incompatible dimmer with a standard toggle switch or a fan-rated speed control often resolves the issue immediately.
Remote Control and Receiver Sync
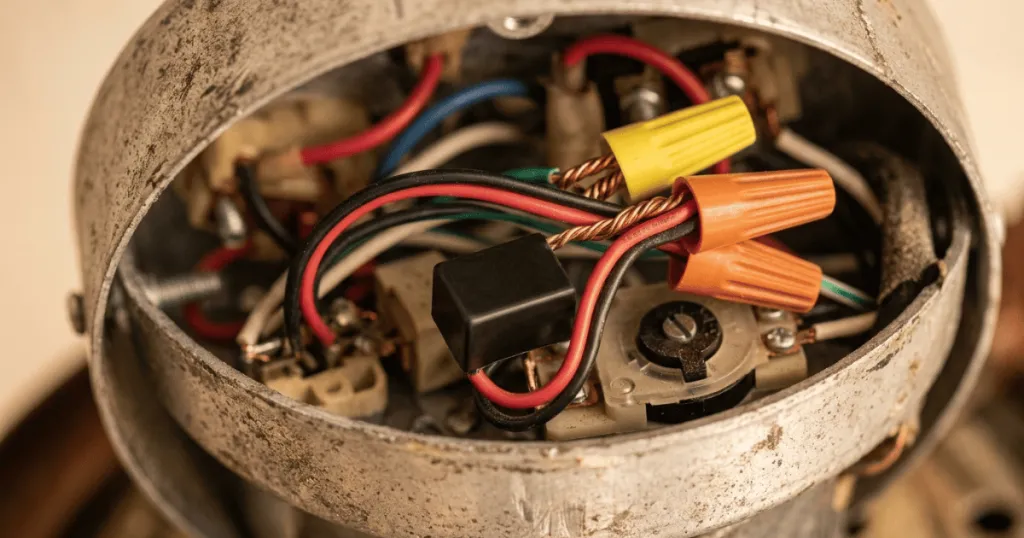
Modern ceiling fans rely heavily on remote controls and internal receivers. If your fan uses a wireless remote, the first step is always to replace the batteries. If the batteries are fresh, the receiver inside the fan canopy may have lost its synchronization with the remote. Most manufacturers include a specific pairing process, often involving cutting power to the fan for thirty seconds and then pressing a pairing button on the remote within a specific timeframe. If the receiver itself has failed, the fan will remain unresponsive regardless of the remote status.
In some cases, radio frequency interference can disrupt the signal between the remote and the receiver. If you have other wireless devices nearby, or if the fan is located in a room with significant metal shielding, the signal might not reach the receiver. Check if the antenna wire inside the canopy is pinched or folded against metal parts, as this can severely limit the range and reliability of your remote control.
Capacitor Failure
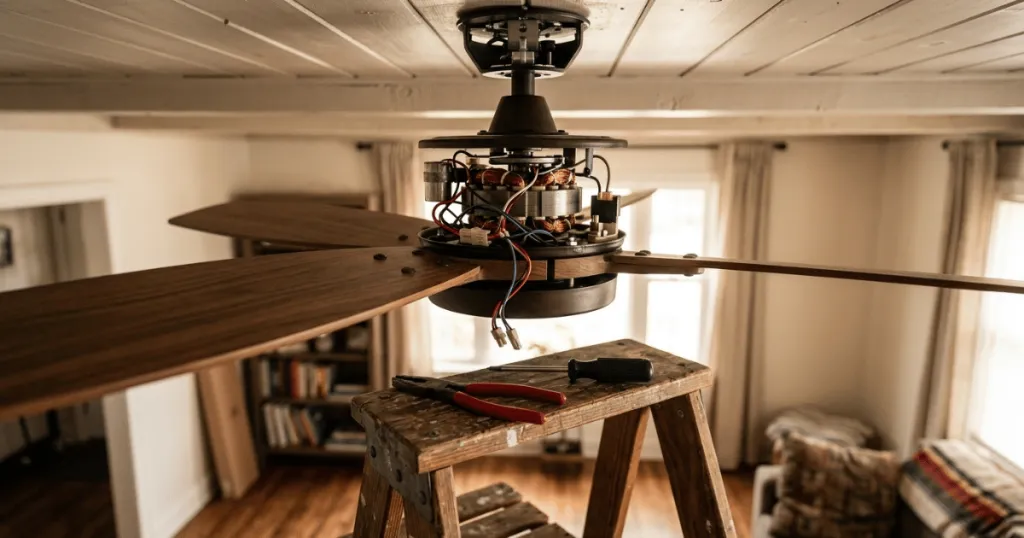
The motor capacitor is a small component responsible for providing the initial jolt of energy to start the fan motor. Over time, these components degrade. If you hear a faint humming sound but the blades refuse to move, or if the fan moves very slowly even on the high setting, the capacitor is likely the failing part. This is a common wear item that does not necessarily mean the entire motor is ruined.
Replacing a capacitor is a task that requires basic soldering or wire nut skills. You must ensure the replacement capacitor matches the microfarad (uF) rating and voltage specifications of the original part. Using an incorrect capacitor can damage the motor windings or cause the fan to run at unsafe temperatures. Always disconnect power before accessing the canopy to inspect this component.
Real-World Context for Fan Troubleshooting
In a residential setting, ceiling fans are often installed in high-traffic areas like living rooms or bedrooms where they are subjected to constant vibration and temperature fluctuations. These environmental factors play a significant role in how components age. For instance, a fan installed in a covered patio or a humid bathroom is more susceptible to corrosion on the wire nuts and internal contacts, which can lead to intermittent power loss.
Consider the physical installation of the fan. If the canopy is not seated correctly, the internal wiring can become pinched or loosened over time due to the natural oscillation of the fan blades. This is especially true if the fan was installed without proper balance. If you notice the fan wobbling, that vibration can eventually cause a wire nut to loosen, leading to a complete loss of connection. In practice, this means that a fan which suddenly stops working might actually be suffering from a loose connection caused by long-term mechanical stress.
Another common scenario involves the pull chains. In older homes, the mechanical pull chain switch is a frequent point of failure. These switches are simple internal mechanisms that can wear out after thousands of cycles. If you pull the chain and feel no resistance, or if you hear a crunching sound, the internal switch has likely broken. Replacing a pull chain switch is a standard DIY task, but it requires careful attention to the wiring diagram provided by the manufacturer to ensure the new switch is connected correctly.
When inspecting for loose connections, check the wire nuts inside the ceiling junction box. Over years of operation, the slight movement of the fan can cause wires to shift. If a wire nut has become loose, the electrical connection may become intermittent. You might find that the fan works only when it is set to a specific speed or when the temperature in the room changes, causing the metal to expand or contract. Tightening these connections is a straightforward fix that often restores full operation.
Why Proper Maintenance Matters
Understanding the health of your ceiling fan is about more than just convenience. A fan that is not working correctly can become a safety hazard. For example, a motor that is humming but not spinning is drawing electrical current without performing work, which generates heat. This heat can damage the internal windings of the motor or even melt wire insulation if left in that state for an extended period. Addressing these issues early prevents minor inconveniences from turning into fire hazards or requiring a full replacement of the unit.
Furthermore, maintaining your fan ensures that you are getting the intended energy efficiency. Ceiling fans are designed to move air effectively at specific speeds. When a fan operates at a reduced capacity due to a failing capacitor or a dirty motor housing, it consumes power without providing the expected cooling effect. By troubleshooting and fixing these issues, you extend the lifespan of the appliance and ensure it continues to serve its purpose in your home climate control strategy.
Regular cleaning is also a form of maintenance. Dust accumulation on the motor housing can act as an insulator, trapping heat inside the motor. While modern fans are designed to dissipate heat, excessive dust buildup can lead to premature wear of internal components. A quick dusting of the motor housing and blades every few months helps the fan run cooler and quieter, which in turn reduces the strain on the electrical system.
Common Misconceptions About Fan Repairs
A frequent mistake is assuming that a non-functional fan requires an expensive motor replacement. In reality, the motor itself is often the most durable part of the unit. Most issues are related to the control electronics, the capacitor, or the wiring connections. Do not rush to replace the entire fixture until you have verified the integrity of the power supply and the remote receiver.
Another misconception is that all ceiling fans are wired the same way. While the basic principles of AC and DC motors remain consistent, the integration of light kits, dimmers, and smart home modules adds layers of complexity. Always consult the specific manual for your model. If you are dealing with a DC motor fan, the troubleshooting steps are quite different from traditional AC fans because DC models use an external transformer or specialized controller that can be sensitive to voltage fluctuations.
Finally, many people believe that a fan that does not turn on is automatically an electrical wiring issue in the walls. While possible, it is statistically much more likely that the problem is contained within the fan canopy or the control switch. Focusing your efforts on the fixture itself is almost always the most efficient path to a solution.
If you suspect a wiring issue within the wall, look for signs of heat or discoloration around the switch plate. If the switch feels hot to the touch, or if you smell burning plastic, you should stop troubleshooting immediately and contact a licensed electrician. These are signs of a dangerous electrical fault that goes beyond simple fan maintenance. Prioritizing safety ensures that you can enjoy the comfort of your ceiling fan without unnecessary risk.
FAQ
Why is my ceiling fan not working even after I changed the batteries?
If fresh batteries do not solve the problem, the remote and the receiver inside the fan canopy may have lost their synchronization. Try performing a power reset by turning the wall switch off for 30 seconds and then following the manufacturer’s specific re-pairing instructions.
Can I fix a ceiling fan that hums but does not spin?
Yes, this symptom usually indicates a failing motor capacitor. The capacitor provides the initial torque to start the motor. Replacing this inexpensive part is a common repair that can restore full functionality to the fan.
Is it dangerous if my ceiling fan stops working?
A fan that hums but does not move can overheat, which is a potential fire risk. If your fan is stuck or making unusual noises, turn it off at the wall switch or circuit breaker immediately until you can diagnose and repair the issue.