Quick Answer: Yes, you can replace a light fixture with a ceiling fan, but you must ensure the ceiling junction box is specifically rated for the weight and dynamic torque of a fan. Standard light boxes are generally insufficient and must be replaced with a fan-rated box or a retrofit fan brace to prevent structural failure.
Many homeowners look at a central light fixture and imagine the cooling comfort of a ceiling fan in its place. The short answer is yes, you can replace a light fixture with a ceiling fan, but the process involves more than just swapping wires. Because ceiling fans are heavy and generate significant torque while in motion, they require a specific type of support that most standard light boxes are not designed to provide.
Understanding whether your current setup can support this upgrade is the most important step in the project. Simply removing a light and hanging a fan from the existing electrical box can lead to dangerous structural failure. Before you begin, you must verify the integrity of your ceiling mount and ensure your electrical system can handle the added load of a motor and light kit.
The transition from a static light to a dynamic fan is a common home improvement project that significantly impacts room comfort. However, the difference in mechanical stress between these two fixtures is substantial. While a light fixture is a static object, a ceiling fan is a piece of rotating machinery. This distinction is why building codes and safety standards, such as those set by the NEC, require specialized mounting hardware for any fan installation.
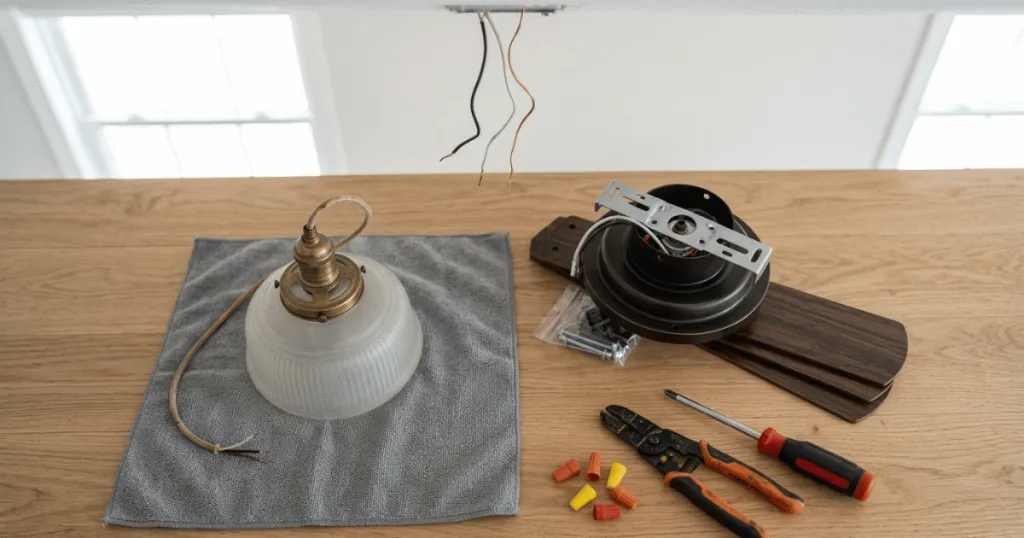
Understanding Structural Requirements for Ceiling Fans
The primary difference between a light fixture and a ceiling fan is weight and movement. A standard light fixture might weigh only a few pounds and remain stationary. A ceiling fan, however, can weigh anywhere from 15 to 50 pounds or more. More importantly, the rotational force of the motor creates constant vibration and stress on the mounting point.
Most residential light fixtures are mounted to a standard electrical box that is nailed to a wooden joist. These boxes are designed to hold the weight of a light, but they are not rated to support the dynamic load of a moving fan. If you install a fan on a non-rated box, the vibrations can eventually cause the box to pull away from the joist, leading to the fan falling from the ceiling.
To safely install a fan, you need a fan-rated junction box. These boxes are constructed with heavier-duty materials and are secured to the ceiling joists with specialized hardware that prevents the box from twisting or loosening. If your current box is not explicitly marked as fan-rated, you must replace it before proceeding with the fan installation.
When evaluating your ceiling, consider the material behind the drywall. In many homes, the ceiling is finished with drywall or plaster, which can hide the underlying structure. If you are working with older construction, you might find that the existing box is attached to a simple wooden block or a thin piece of lath. These materials lack the structural integrity to withstand the constant rotational torque of a fan motor. A fan-rated box is typically secured directly to the ceiling joists using heavy-duty lag bolts or specialized mounting brackets that distribute the weight across the framing members. This ensures that the dynamic load is transferred safely to the house structure rather than relying on the ceiling finish for support.
How to Identify a Fan-Rated Box
You can often identify a fan-rated box by looking for specific markings stamped into the metal or molded into the plastic. Look for labels that state the box is suitable for fan support or that provide a specific weight rating, such as 35 or 70 pounds. If you cannot find any markings, assume the box is not rated for a fan.
In many older homes, the junction box may be attached to a thin metal bar or simply screwed into a piece of lath and plaster. These setups are insufficient for the weight of a modern fan. If you find yourself in this situation, you will likely need to install a retrofit fan brace. These braces are designed to be inserted through the hole in the ceiling and expanded until they grip the joists on either side, providing a secure anchor for the fan.
When selecting a retrofit brace, ensure it is UL or ETL listed for ceiling fan use. These braces often feature a telescoping design that allows them to span the distance between joists of varying widths. Once the brace is positioned, you tighten the mechanism until it is firmly locked against the joists. This creates a rigid foundation that eliminates the risk of the fan wobbling or sagging over time. Always verify that the box provided with the brace is also rated for the specific weight of the fan you intend to install, as some fans with heavy light kits or decorative housings may exceed the capacity of standard retrofit kits.
Electrical Considerations and Wiring
Beyond the physical support, you must consider the electrical capacity of the circuit. Most ceiling fans include both a motor and a light kit, which can draw more current than a simple light fixture. While most standard lighting circuits can handle the load of a single fan, you should check the total wattage of all devices on that circuit to avoid overloading the breaker.
Another common consideration is wall control. If your existing light fixture is controlled by a single wall switch, you will need to determine how you want to operate the fan. Many modern fans come with remote controls that allow you to adjust speed and light independently. If you prefer wall-mounted controls, you might need to run additional wiring or install a specialized fan control switch that communicates with the fan receiver.
If you are replacing a light that is part of a multi-switch setup, such as a three-way switch, you must be careful during the wiring process. Ceiling fans often require a dedicated hot wire for the motor and one for the light. If your existing wiring does not support independent control, you may be limited to using a remote-controlled receiver tucked into the fan canopy. This receiver acts as an intermediary, allowing you to control both the light and the fan motor using a single power source. It is a practical solution for rooms where adding new wiring would require cutting into the walls or ceiling.
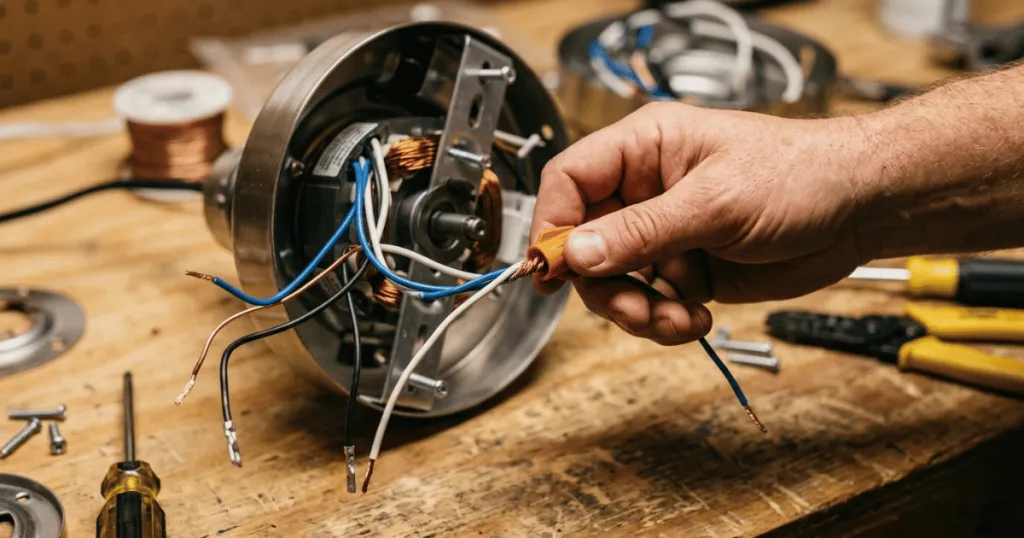
When dealing with electrical safety, always ensure the power is turned off at the breaker panel before touching any wires. Use a non-contact voltage tester to confirm that the circuit is dead. If you find that your existing wiring is old or damaged, such as frayed insulation or brittle wires, it is advisable to consult with a professional. Modern fans often include complex electronics in their receivers, and a stable, clean power supply is essential for their longevity and performance.
Real-World Context for Installation
When you decide to replace a light fixture with a ceiling fan, the room environment plays a significant role in the success of the project. For example, in a bedroom with low ceilings, you will need to prioritize a flush-mount or hugger-style fan to maintain adequate clearance. Installing a downrod-style fan in a room with an eight-foot ceiling can create a safety hazard for taller individuals.
Noise sensitivity is another factor that often surprises homeowners. A fan that is improperly mounted or lacks a secure, fan-rated box will often produce an audible hum or clicking sound as the vibrations travel through the ceiling joists. Ensuring a rigid, stable connection to the structure is not just about safety; it is the most effective way to ensure quiet operation.
Climate also dictates your choice of fan. If you are replacing a light in a humid environment like a bathroom or a covered porch, you must ensure the fan is rated for damp or wet locations. Standard indoor fans can suffer from motor corrosion or warping of the blades when exposed to high moisture levels over time. In these environments, the choice of materials, such as stainless steel hardware or moisture-resistant blades, is critical for long-term reliability.
Consider the airflow expectations for the room as well. A small fan in a large living area will not provide the desired comfort, while an oversized fan in a small room can create an uncomfortable draft. Measure your room dimensions carefully before selecting a fan. As a general rule, larger rooms benefit from larger blade spans, which allow the fan to move more air at lower speeds, resulting in quieter operation and more efficient air circulation.
Why Proper Mounting Matters
The decision to replace a light fixture with a ceiling fan is a long-term investment in home comfort. When done correctly, the fan provides consistent air circulation that can reduce the load on your HVAC system. However, cutting corners on the mounting hardware is a common mistake that leads to costly repairs or potential injury.
The most important takeaway is that the ceiling box is the foundation of the entire installation. If the foundation is weak, the fan will never perform as expected. Even if the fan appears stable immediately after installation, the constant torque of the motor will exploit any weaknesses in the mounting hardware over time.
Prioritize safety by inspecting the joist access before you purchase your fan. If you have attic access above the room, installing a new fan-rated box is a straightforward process. If you do not have attic access, you will need to use a retrofit brace that can be installed from below. Understanding these requirements early will save you from having to take down a partially installed fan because the mounting point was insufficient.
Beyond the structural and electrical aspects, consider the aesthetic and functional integration of the fan into your space. A well-installed fan should look like a natural part of the room. This means choosing a finish that complements your existing hardware and a style that matches your home decor. However, never prioritize aesthetics over the technical requirements. A beautiful fan that is poorly mounted is a liability, whereas a properly supported fan will provide years of reliable service and comfort.
Common Misconceptions
A frequent misunderstanding is the belief that if a light fixture feels secure, it can hold a fan. A light fixture that does not move when you pull on it is secure for a light, but it is not necessarily secure for the dynamic, shifting weight of a motor. Never rely on the feel of the existing box as a substitute for verifying its rating.
Another misconception is that all ceiling fans are heavy. While some are, many modern fans use lightweight materials. Regardless of the weight of the fan, the manufacturer instructions will almost always specify that a fan-rated box is required. Ignoring these instructions because the fan feels light is a significant safety error.
Finally, some homeowners assume that they can simply wire the fan to the existing light switch and everything will work perfectly. While this is often true for basic operation, it ignores the complexity of modern fan features like dimmable LEDs or variable speed motors. Always read the wiring diagram provided with your specific fan model to ensure compatibility with your wall switches. If you are unsure about your wiring configuration, take the time to map out the circuit or consult the documentation provided by the manufacturer. Taking these extra steps ensures that your DIY installation is both safe and functional for years to come.
FAQ
How do I know if my electrical box is fan-rated?
Look for markings on the inside of the box that explicitly state it is suitable for fan support. If you see no markings or if the box is attached to a thin metal bar, it is likely not rated for a fan and must be replaced.
Can I install a ceiling fan if I don’t have attic access?
Yes, you can use a retrofit fan brace. These devices are inserted through the hole in the ceiling and expanded to grip the joists from the inside, providing a secure mounting point without needing access from above.
Do I need to change the wiring to replace a light with a fan?
In most cases, you can use the existing wiring. However, if you want independent control of the light and the fan motor from a wall switch, you may need additional wires or a remote control receiver to manage the functions.